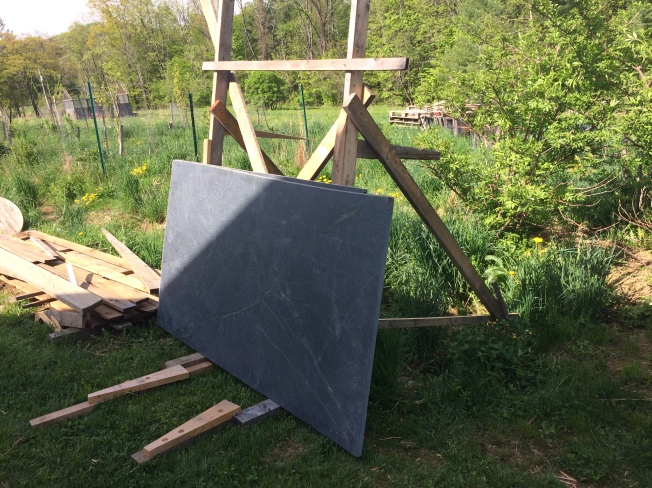
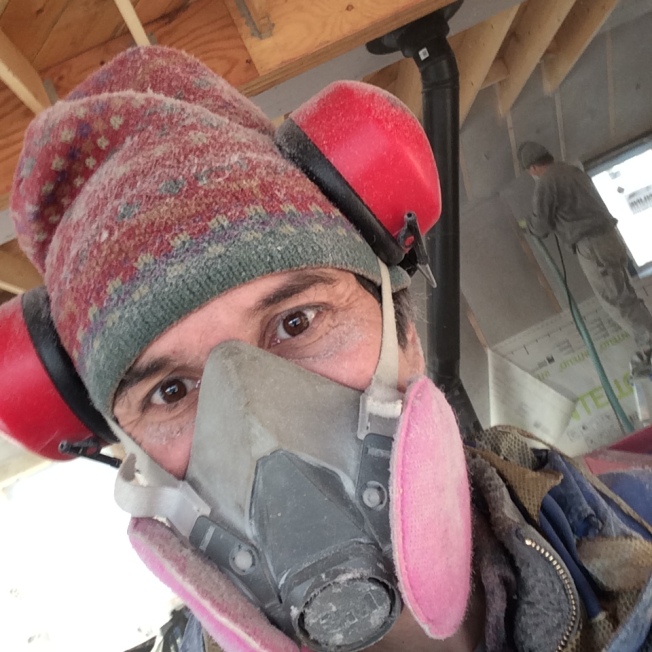
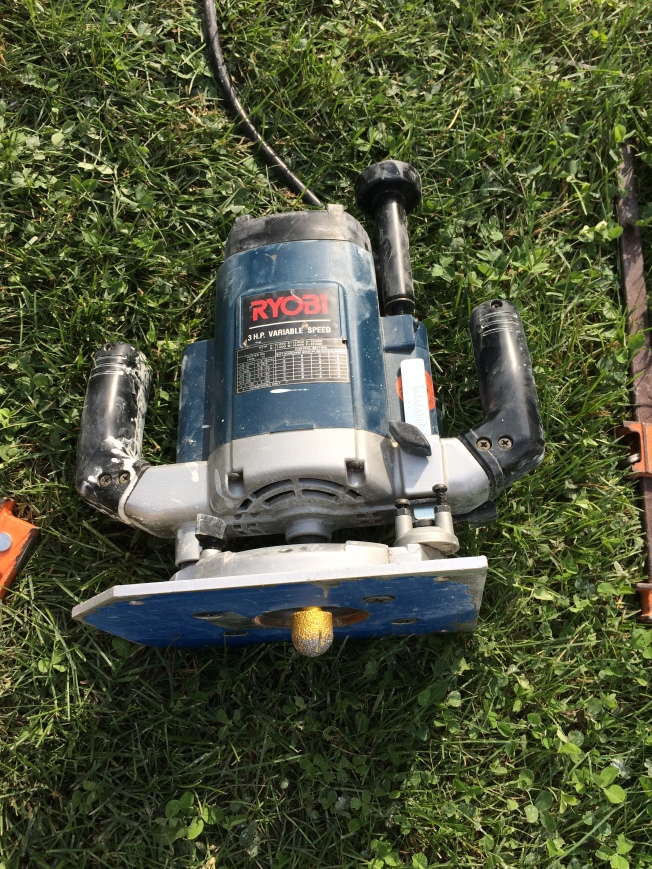
Summer has come and gone.  It’s feeling quite fall-like here in Southern Vermont.  We’ve made a lot of progress on this house of our and it all started with the blue suit way back in the beginning of June.  That’s when we started cutting the soapstone slabs.  Cutting soapstone without an expensive wet-saw is a dusty operation – hence the blue suit.  And the respirator.  And the ear protection and glasses.  And a lot of time.

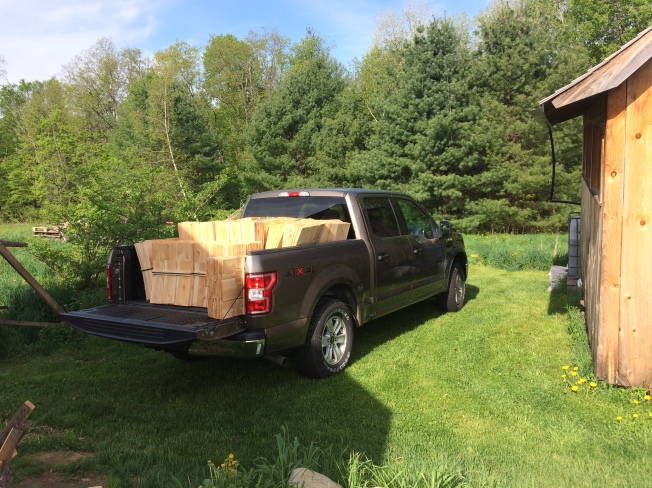
But we proved that it can be done on a tight budget.  I’ve had estimates for $100/sf installed by a stone countertop company.  Our soapstone countertops cost us $24/sf plus transportation costs ($175 truck rental and gas) and about $100 in diamond bits, blades, and buffing pads.

IMG_0719

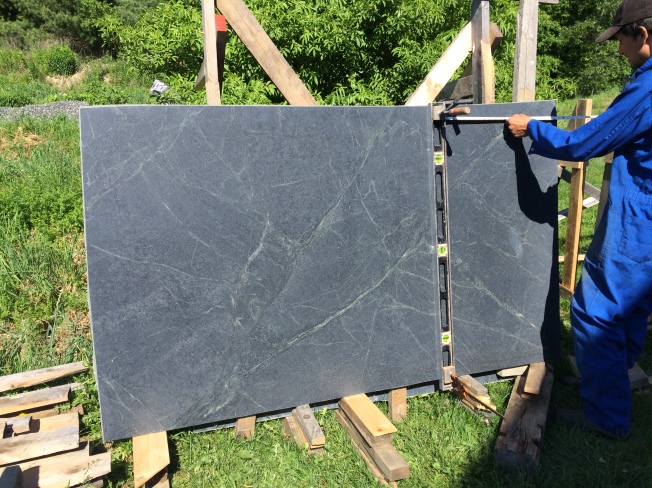
I’ve cut slate and soapstone before, but this variety of soapstone is quite hard – more on par with slate than the softer soapstones.  We started using a level as a straightedge and a heavy-duty circular saw with a diamond masonry blade.

IMG_0722


IMG_0725

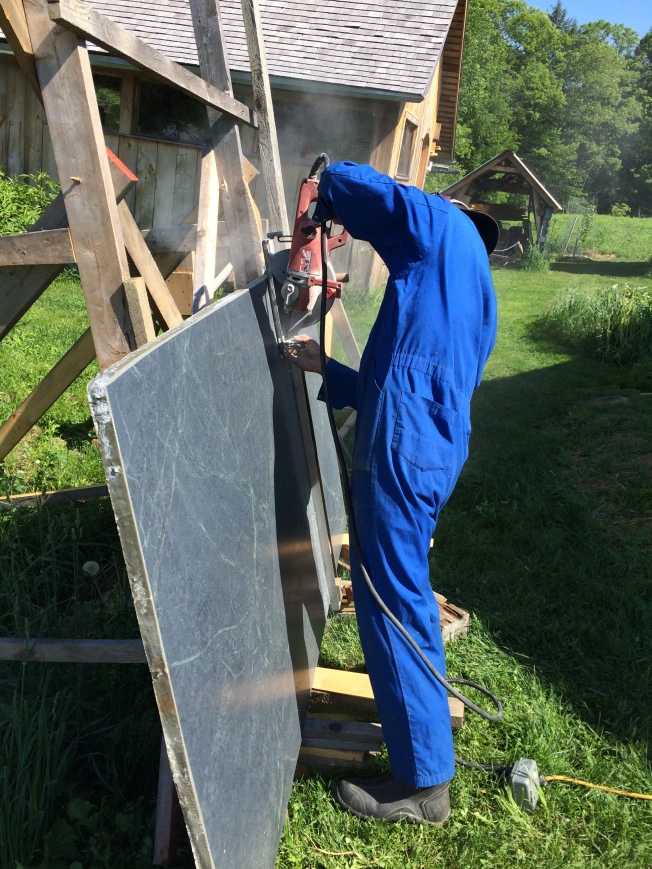
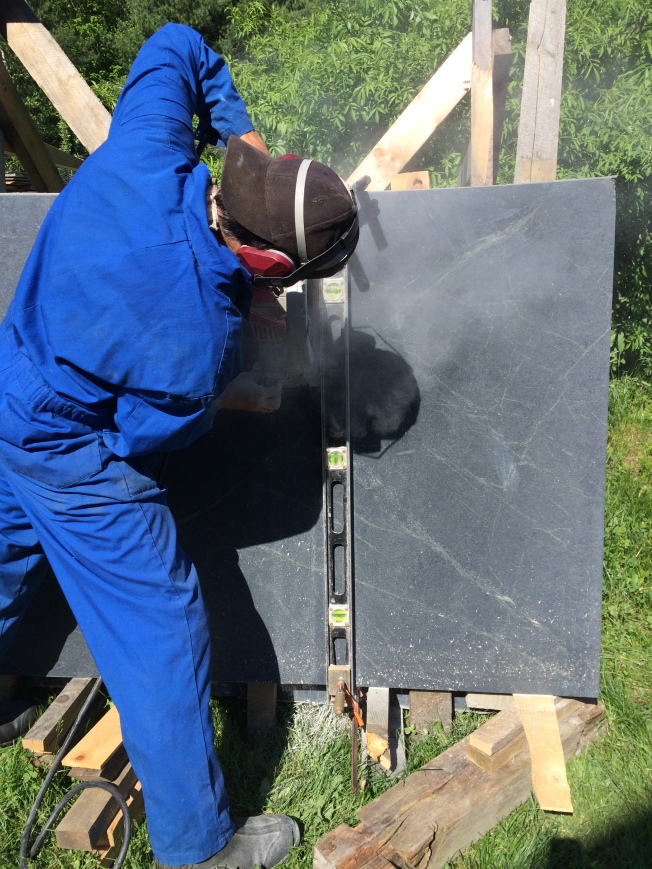
This didn’t give the best cut and required quite a bit of cleanup afterwards.  The angle grinder with a diamond blade worked much better.  After a few cuts I figured out that if I scratch a line in the stone, I could just freehand the cut with the angle grinder with much more accuracy than trying to guide it with a straightedge.  This required a little squaring up of the cut afterwards with the angle grinder and a diamond grinding wheel, but it wasn’t too bad.  The cuts in the back didn’t need to be cleaned up because they are hidden by the backsplashes, while the cuts that would be the counter fronts did

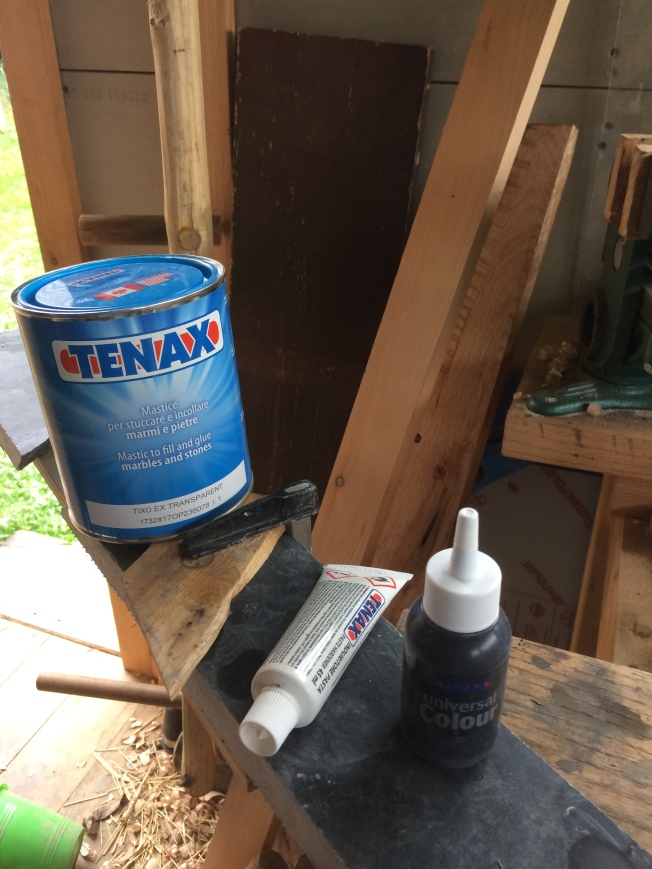
We cut out the backsplashes from the big slabs.  A couple of the thin backsplashes broke where there was an existing crack in the slab.  We thought that might happen, so we purchased this specialty knife-grade stone epoxy.  It’s pretty easy to use, but it sets up fast and is very stinky!  Not like dirty socks stinky, chemistry class stinky.  We colored the epoxy black to match the color of the stone after oiling it.  The glued joints are very strong and after sanding the joint, it really disappears after the application of the mineral oil.

IMG_5758

IMG_5760

IMG_5761

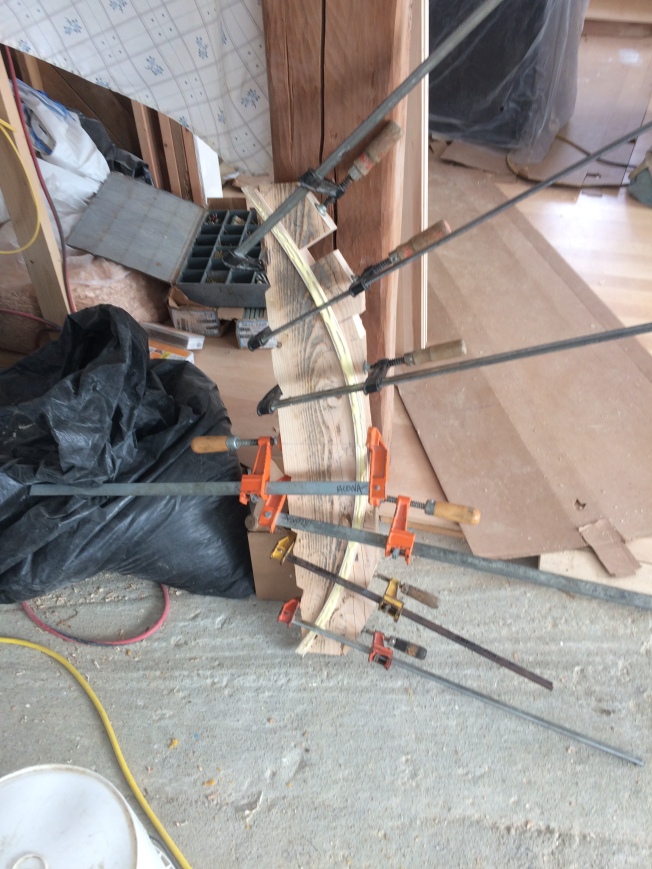
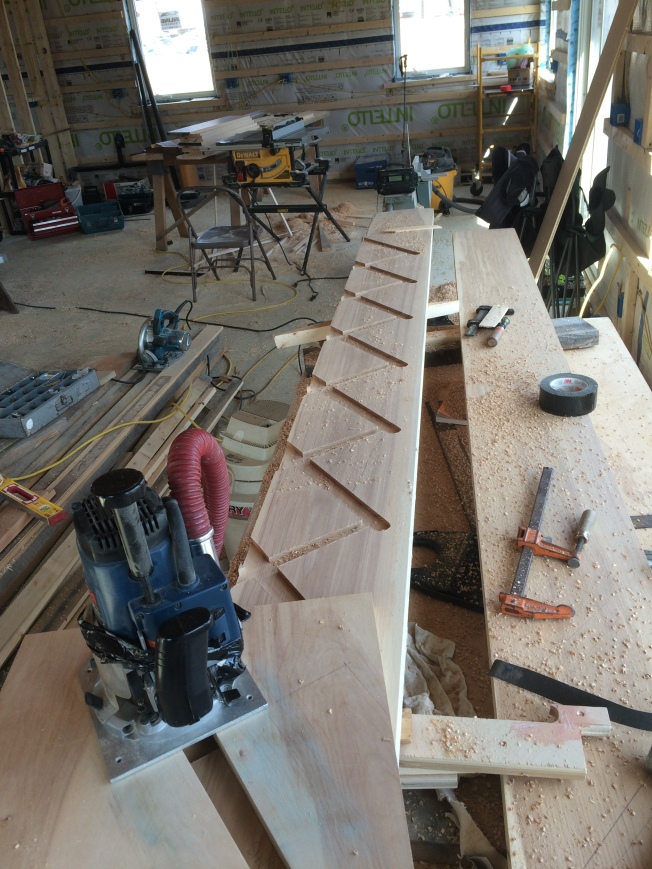
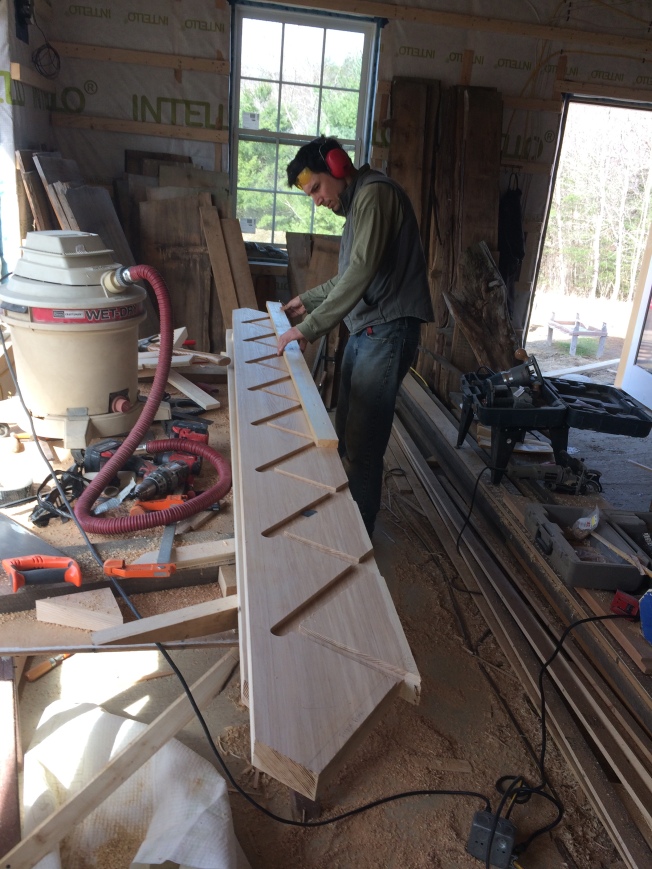
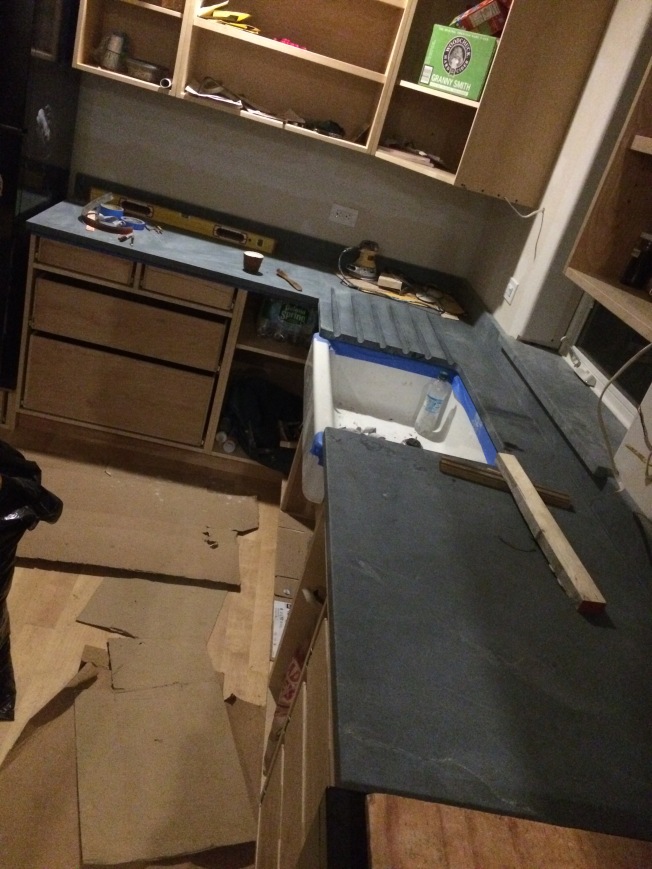
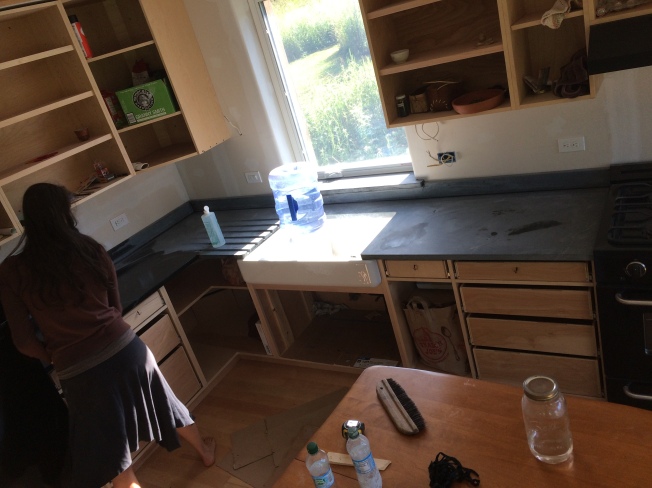
The trickiest part of the whole install was making these tapered grooves where our drying rack will go.  We got this idea from the source of many great ideas – a google image search.   I was somewhat skeptical that it would actually work.  I wasn’t convinced that the water from the drying dishes would find its way into the grooves and not just go the other way, but it does.  It drains into the sink quite well.  Some water does sit between the grooves and just evaporates there, but the majority of it goes into the sink.

IMG_5773

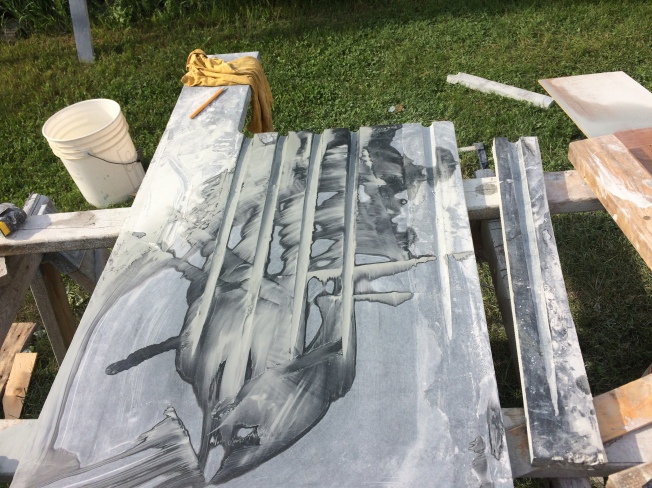
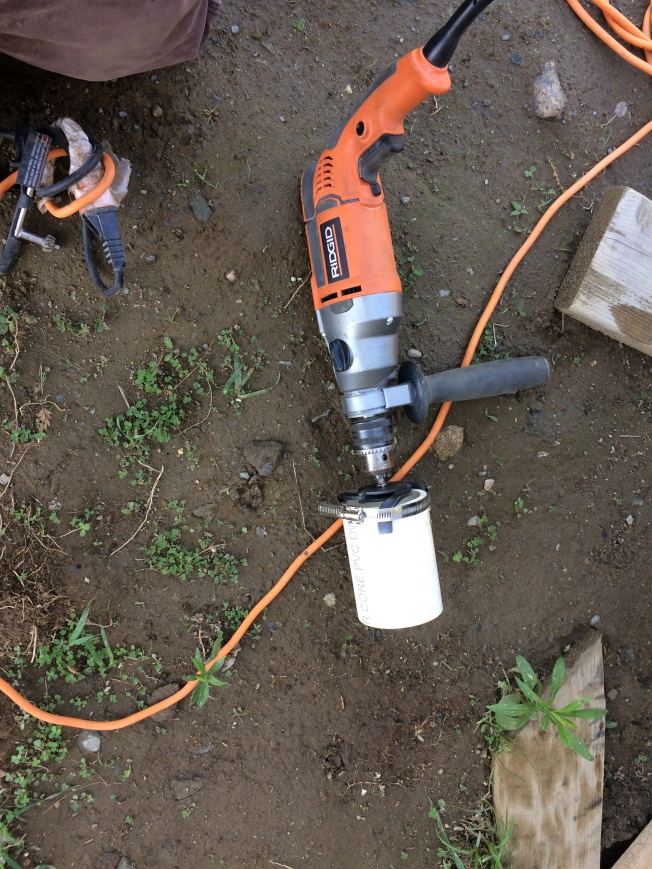
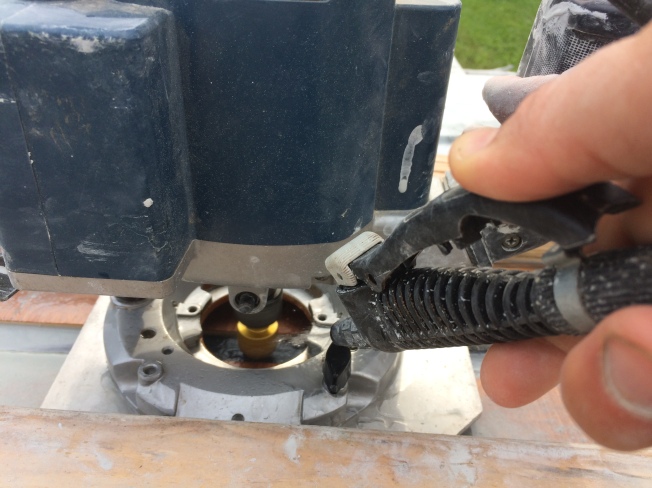
To make the grooves, the first step was to find the proper diamond router bit.  That took way too many hours of searching.  Eventually I found one that I thought would work, and it did.  60 grit in a nice gold color for under $15.  Nothing but the best.  I was also feeling a little nervous about wasting such a valuable piece of stone if it didn’t work –  we didn’t have enough extra to mess this one up.

IMG_5774

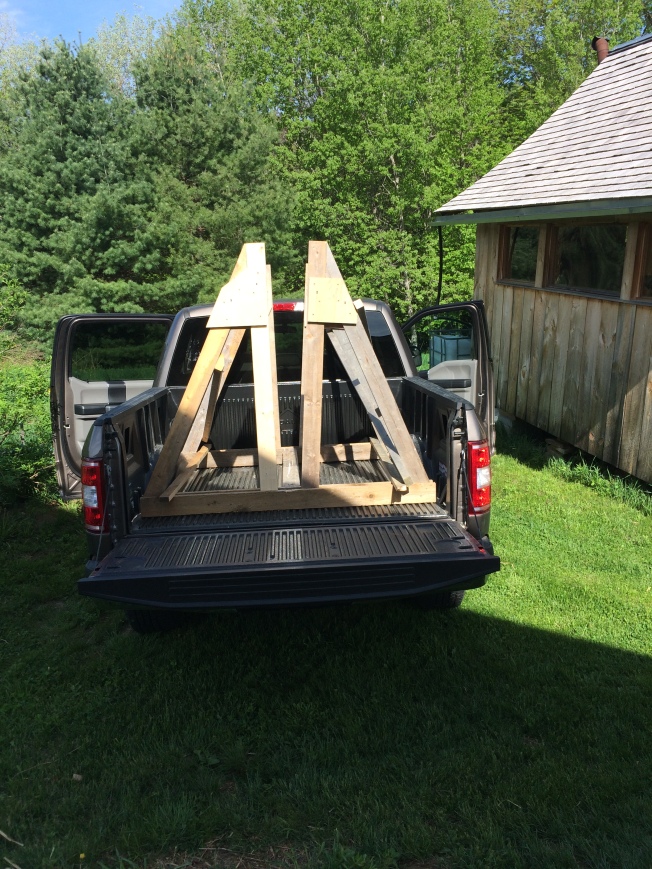
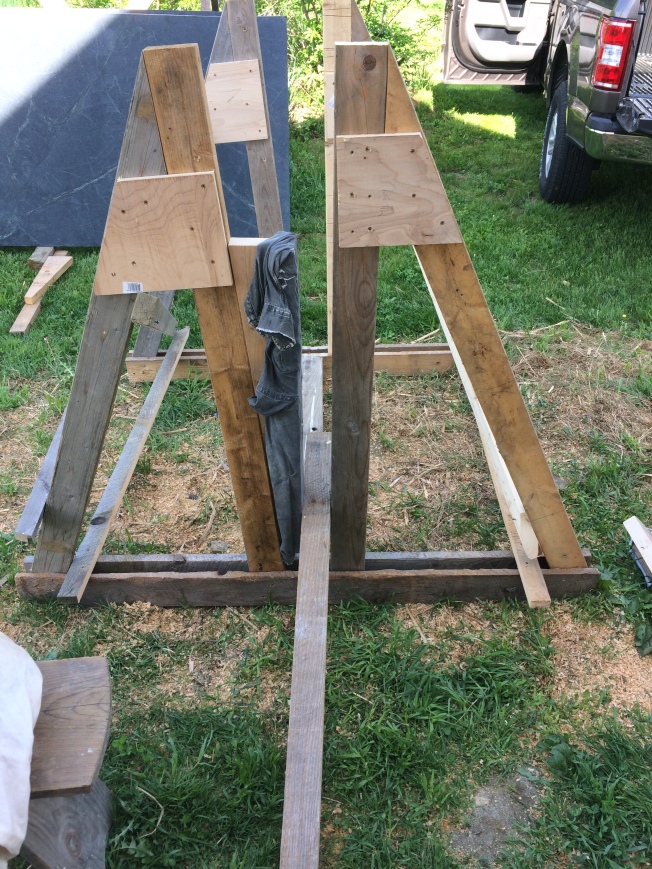
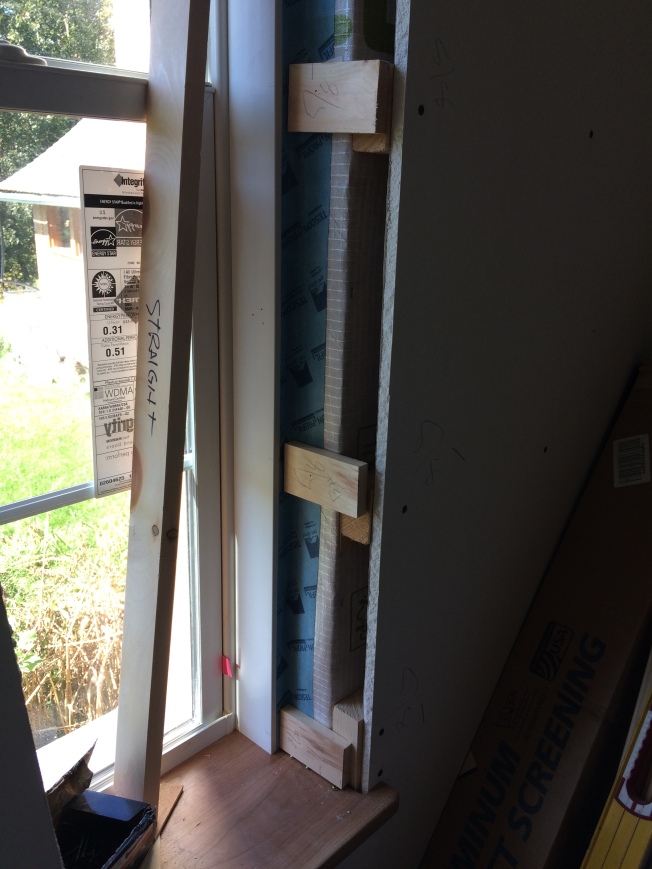
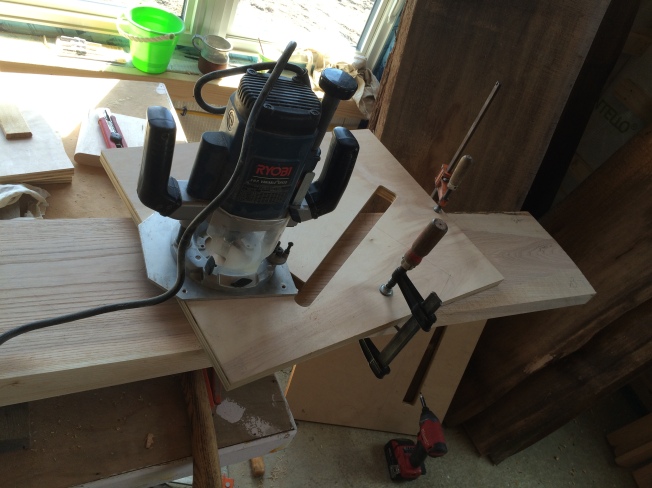
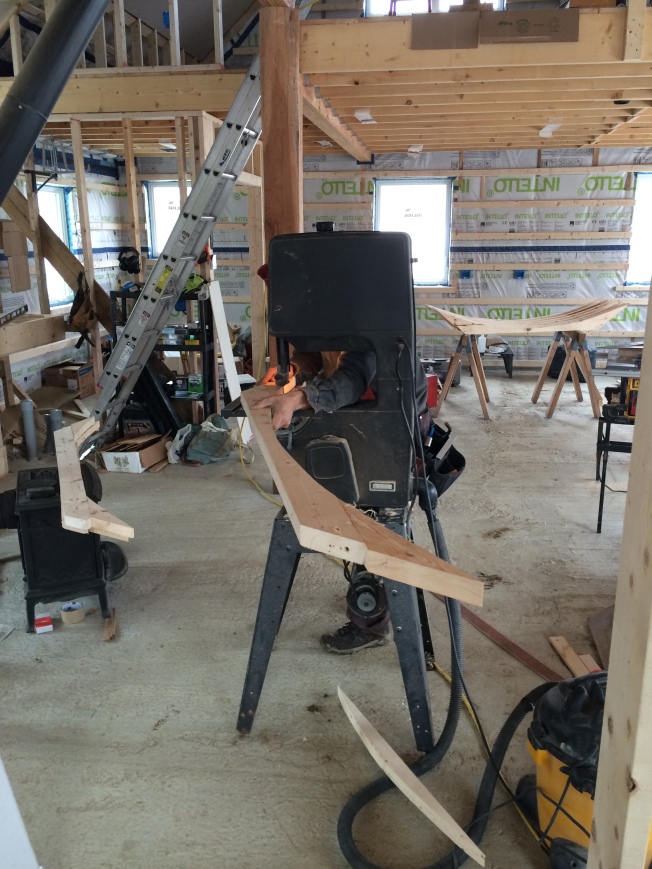
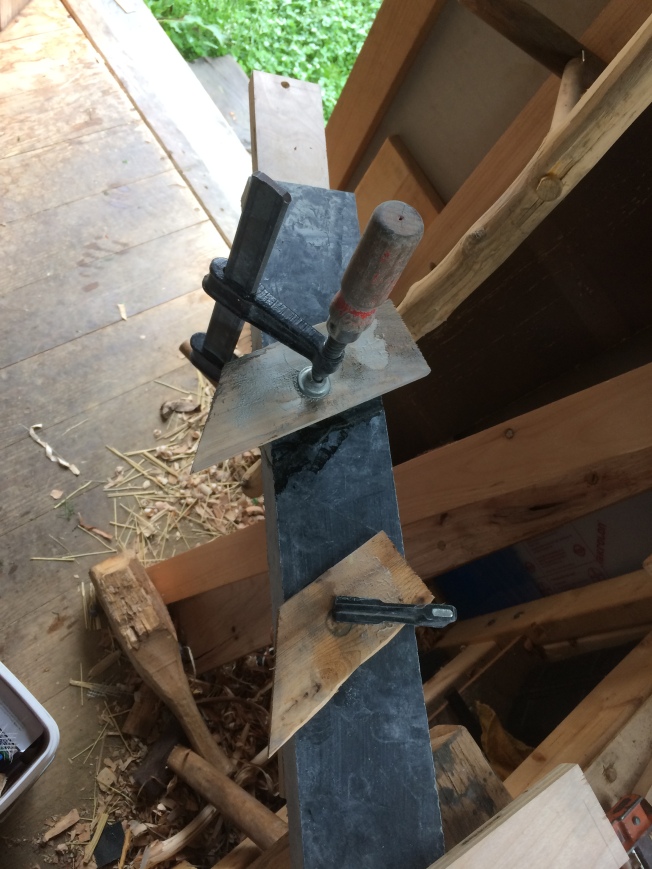
Next we built a tapered jig for the router to slide back and forth in – I apologize that I don’t have a better picture of this jig, but it was pretty simple made from ¼” plywood and some spruce 1×3’s to contain the router base and some long tapered wood strips to go under the ¼” ply.  While routing, we sprayed the bit with water from a pump sprayer to increase the longevity of the bit.  We couldn’t take too much off in each pass, maybe 1/16 to ⅛” at a time.  It was slow going, but it went.  This worked fine even though our router is a standard woodworking router.  The router motor stayed mostly dry and it still works.  The bit, however, is pretty worn out.

IMG_5776

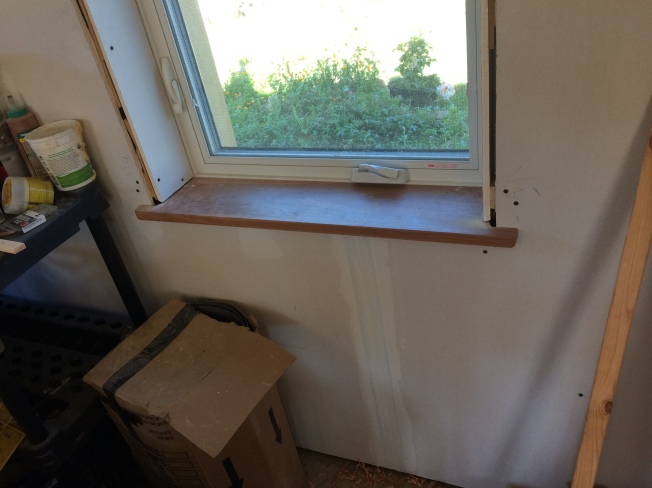
After routing, we diligently sanded the grooves with 150 grit sandpaper and water by hand (or finger in this case).  After that the grooves were looking pretty good.  I cut a small ¼” groove about ¼” deep up into the bottom of the stone where the water drips to encourage drips to form and not to just run down the side of the sink.  Most window sills have this feature if you look closely.  It works well.

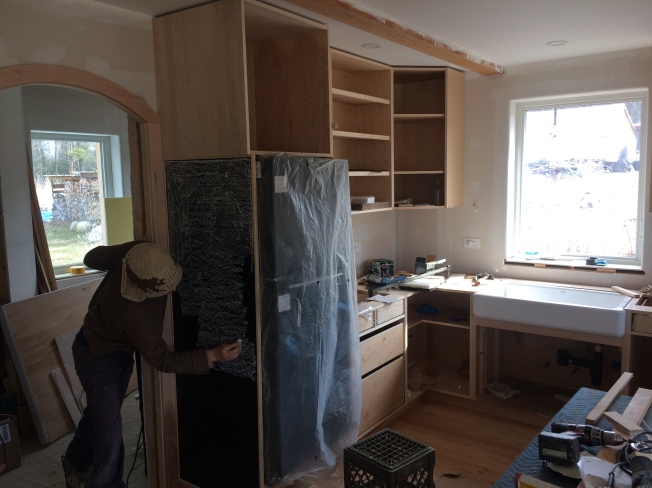
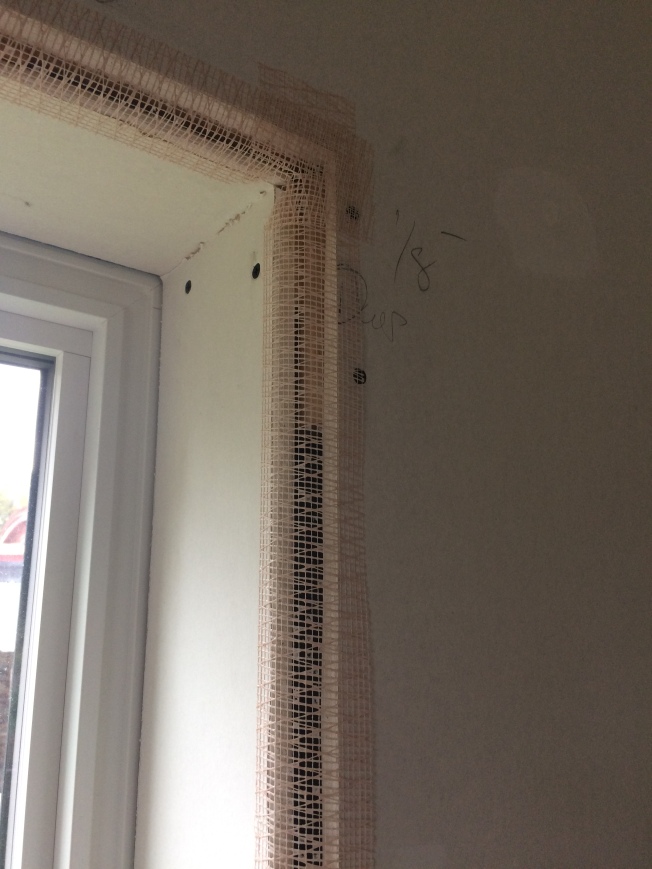
After that, we were ready for the install of the counters, backsplashes, and window sills.  The tape is so that we could easily wipe off the silicone after is squishes out from under the counter and for keeping the black epoxy from making too much of a mess at the seams.

IMG_5777

Doing the black epoxy in the seams of the stone was also a bit tricky only because it sets so fast.  We tested everything for the proper fit before doing the final glue.  After glue, we sanded the seams flat with diamond abrasive pads in a random orbital sander.  They are super smooth and blend in really well.  Here is a video that shows the glue in use.

IMG_0733

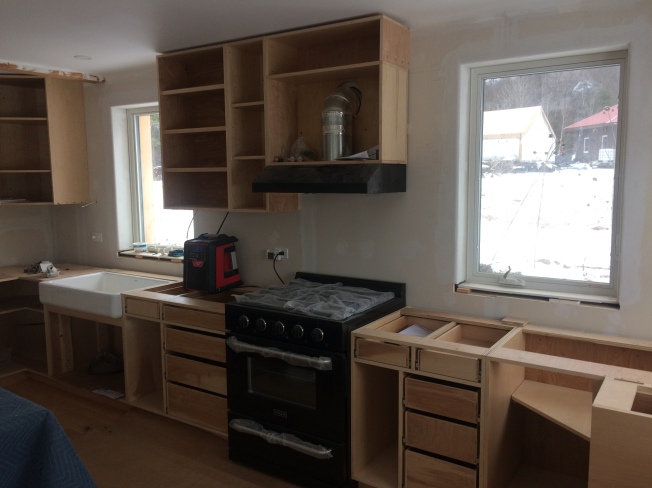
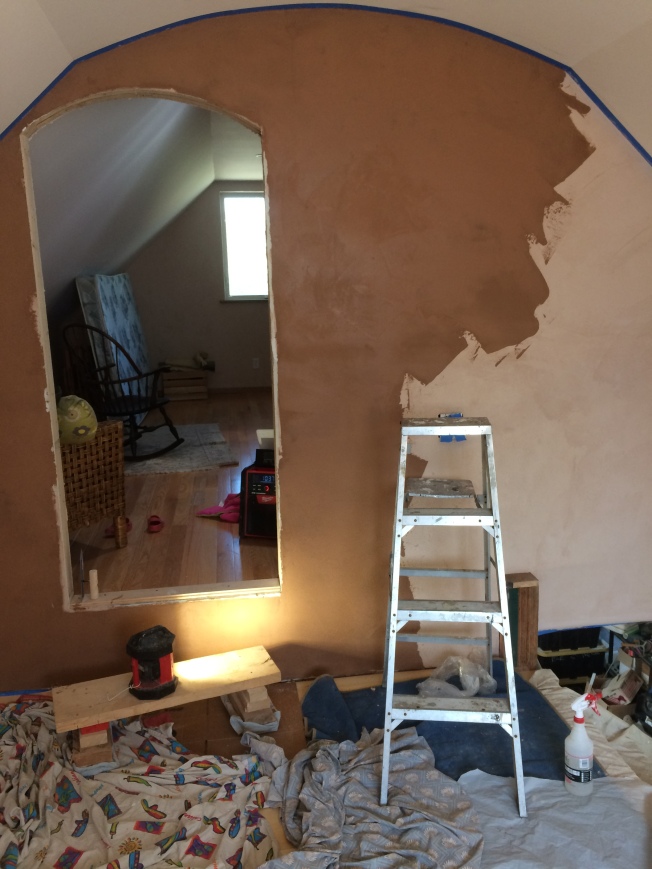
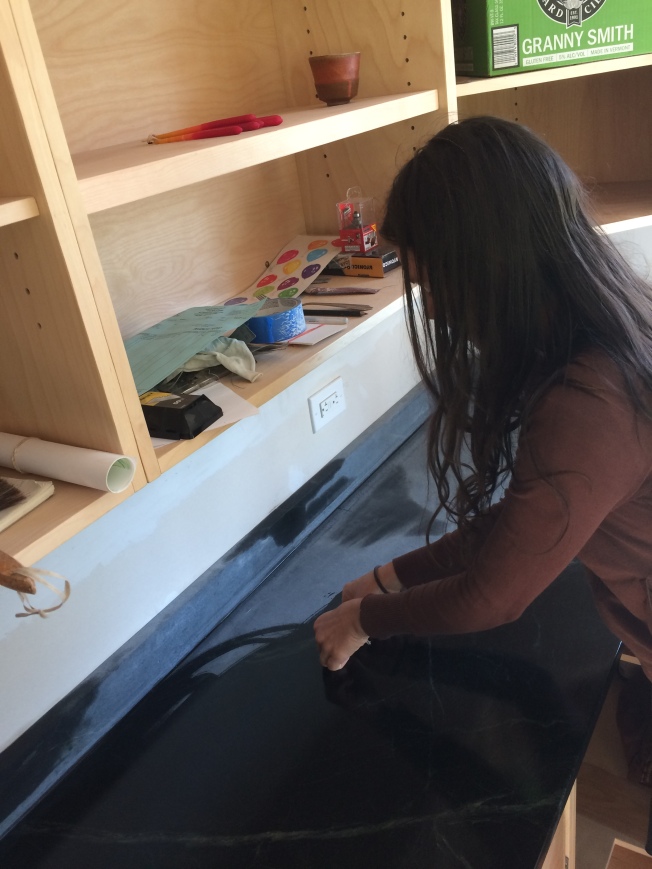
After the seams were finished, we were ready to oil the counters.  The oil we use was given to us by the stone people.  They told me to sand the surface to a 150 grit but no finer so there were scratches that would get filled with the mineral oil.  You can see how the oil really darkens the stone.  The slabs came with a 400 grit polish on them so we actually had to dull the surface to prep for the oil – seemed a bit “counter” intuitive (pun intended).

IMG_5783

IMG_5782

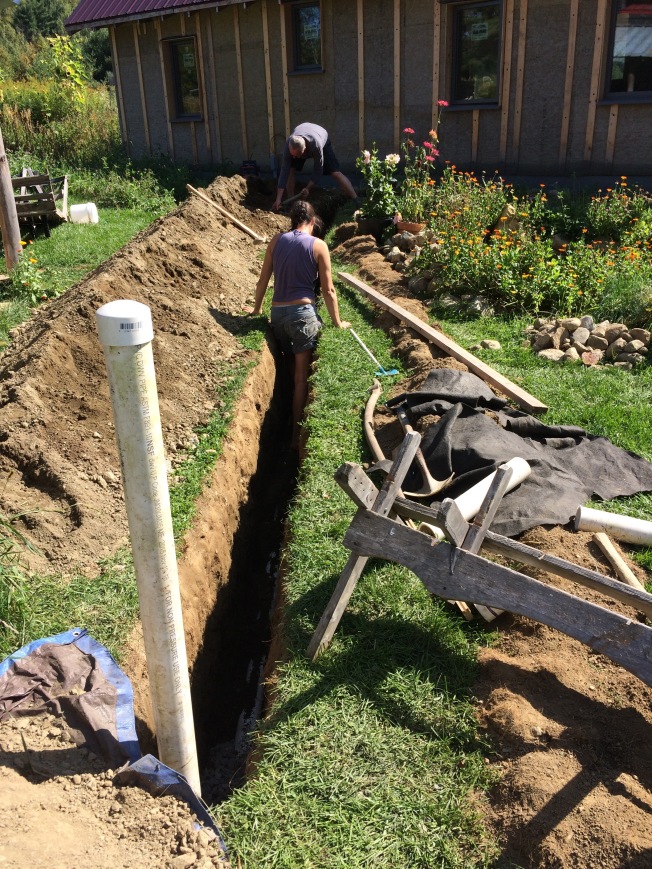
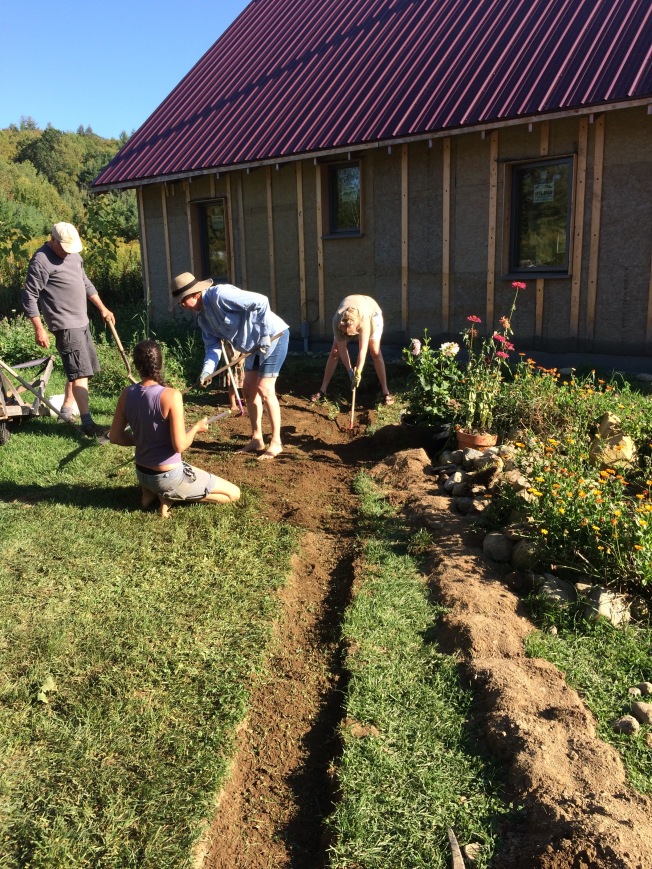
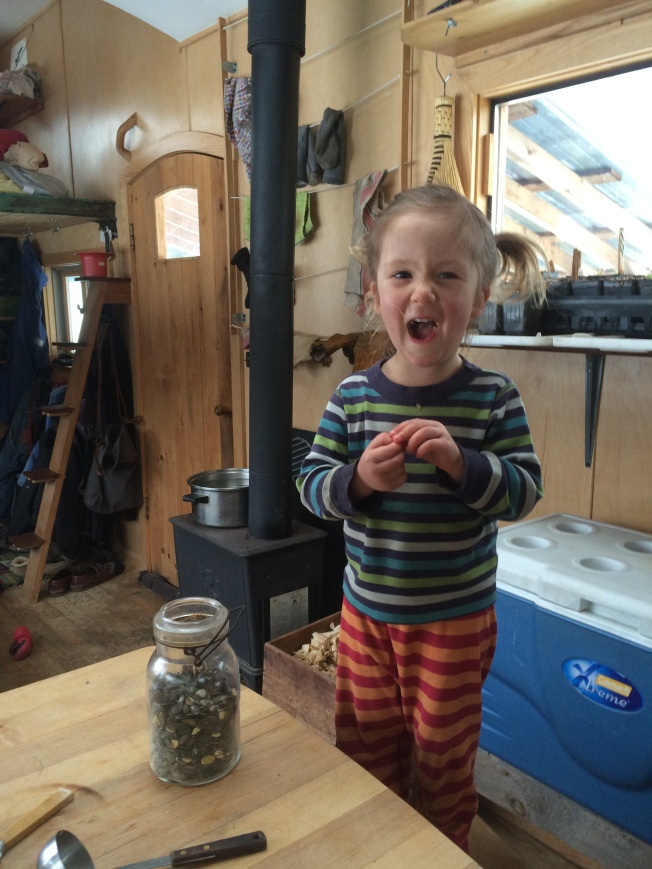
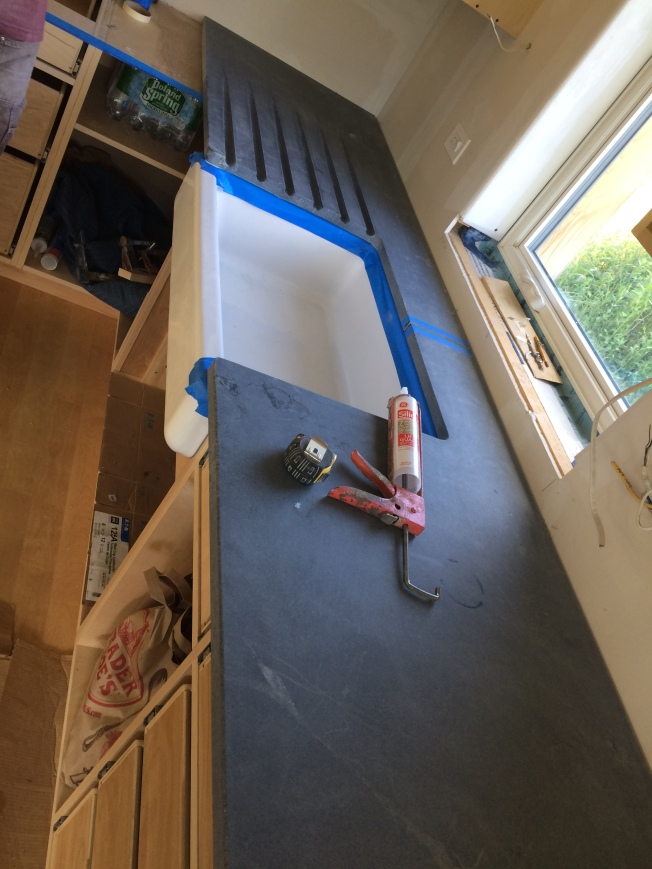
As we don’t as of yet have running water, we keep a 5 gallon jug of rainwater on the edge of the sink for hand washing and dishwater.  This system is a little less convenient than the foot-pump operated sink we had in the tiny house, but because our plan is to install a shared pressurized water system with our neighbors on our shared well next year as part of our cooperative homestead, we opted to not drill the holes in the cabinets for the foot pump.

IMG_5847

IMG_5846

FullSizeRender

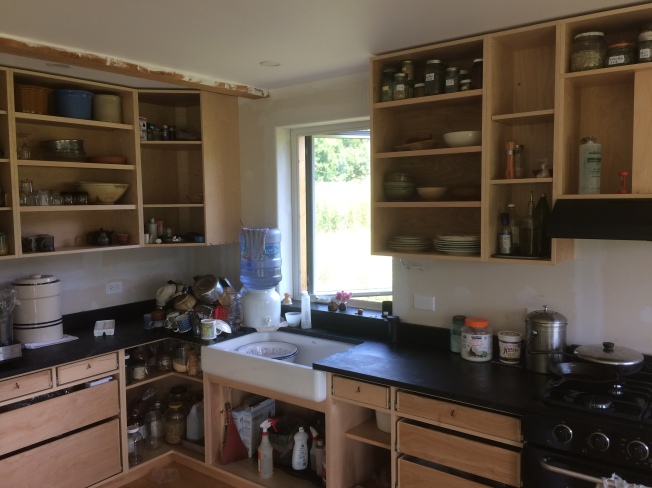
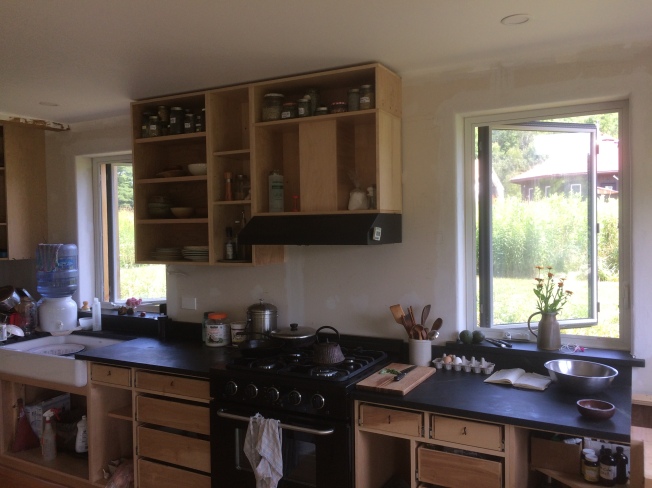
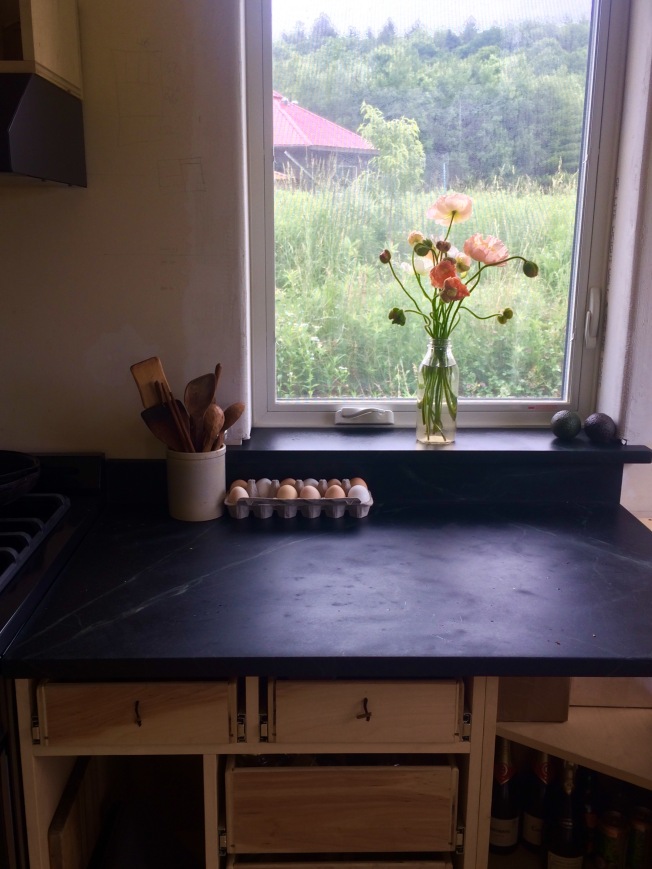
We’re all quite happy with the counters.  They are easy to clean, soft to the touch, and warm up in the sun.  IMG_5845

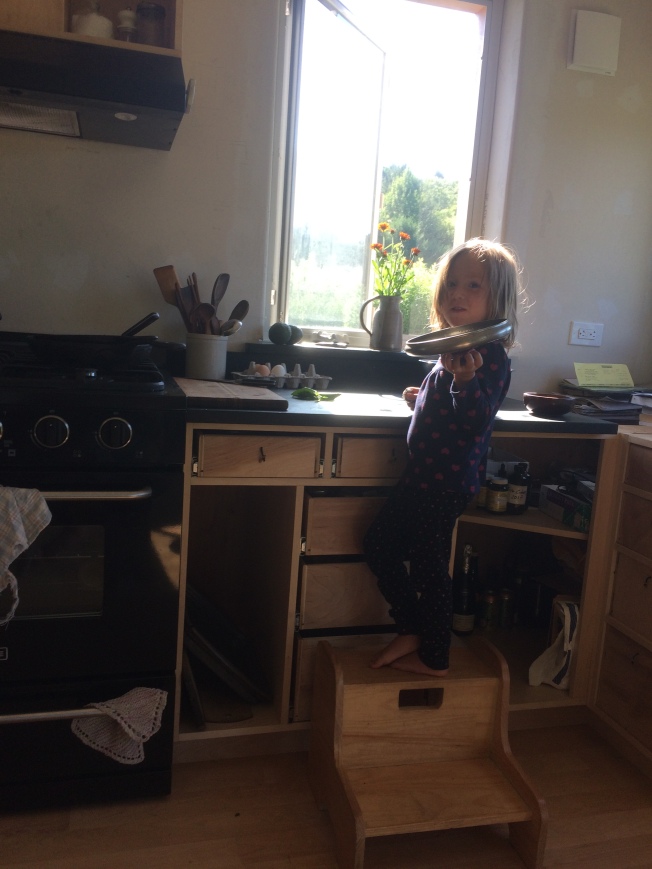
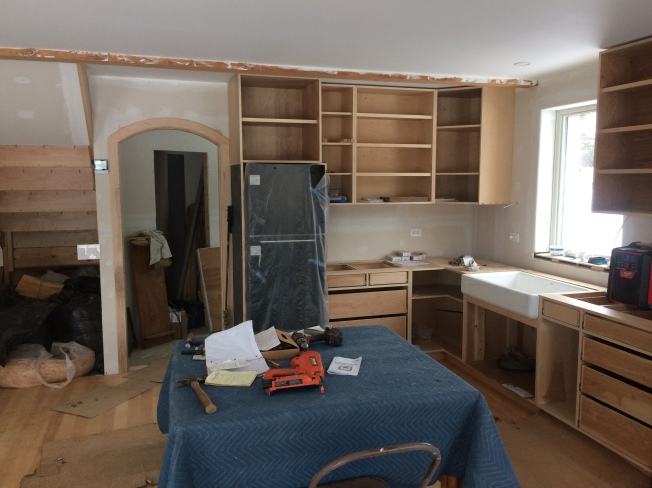
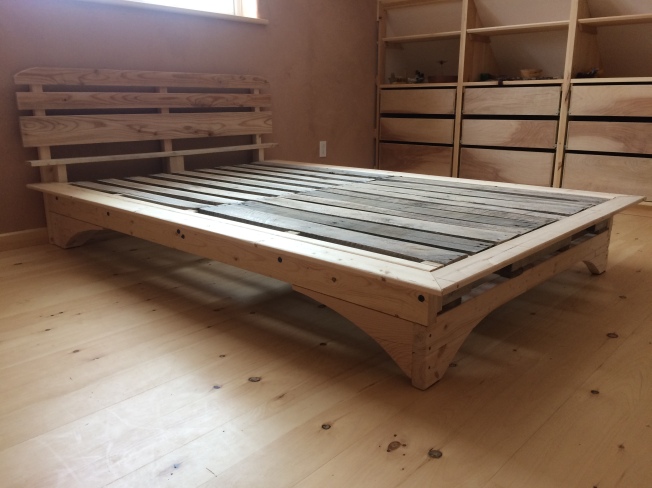
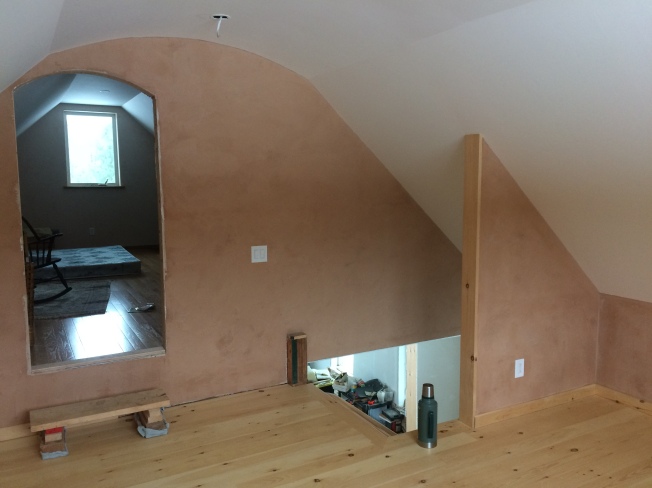
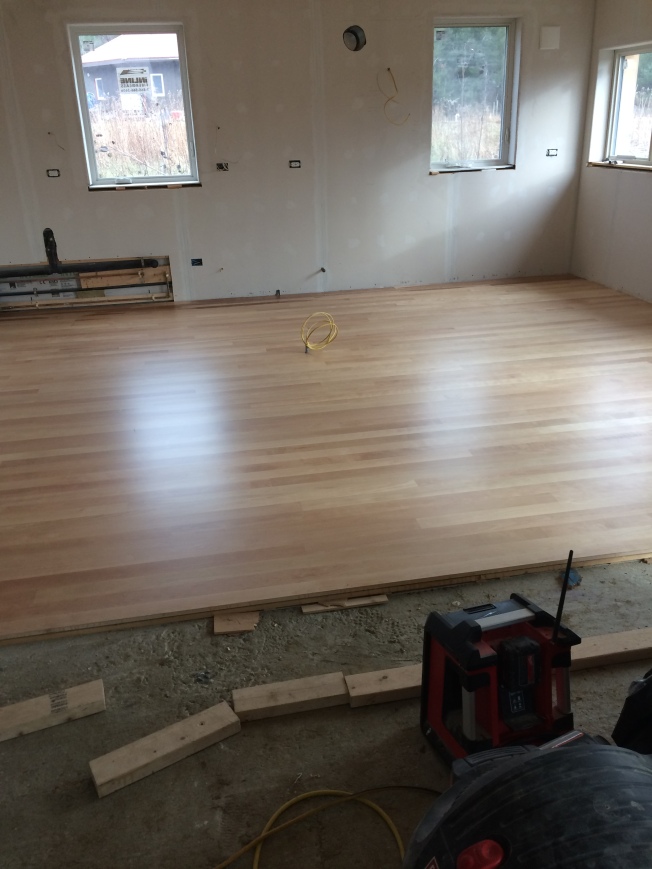
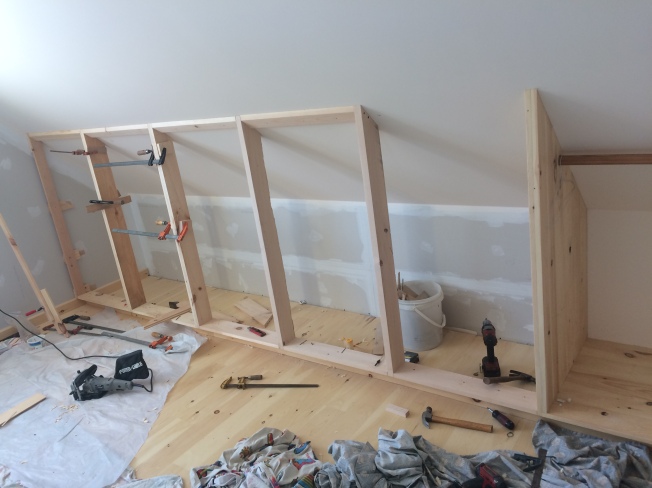
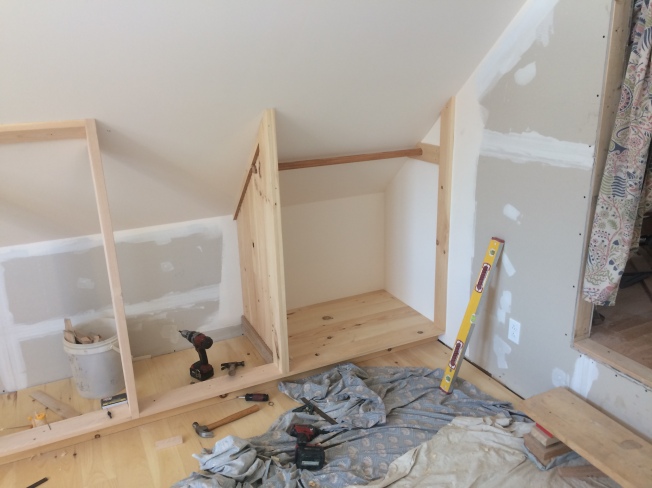
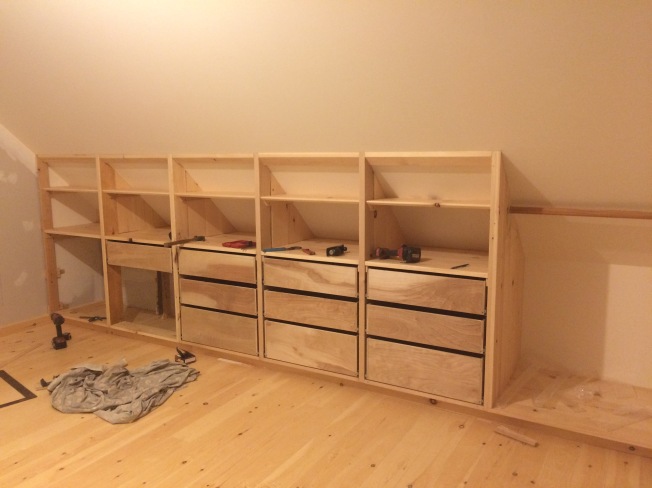
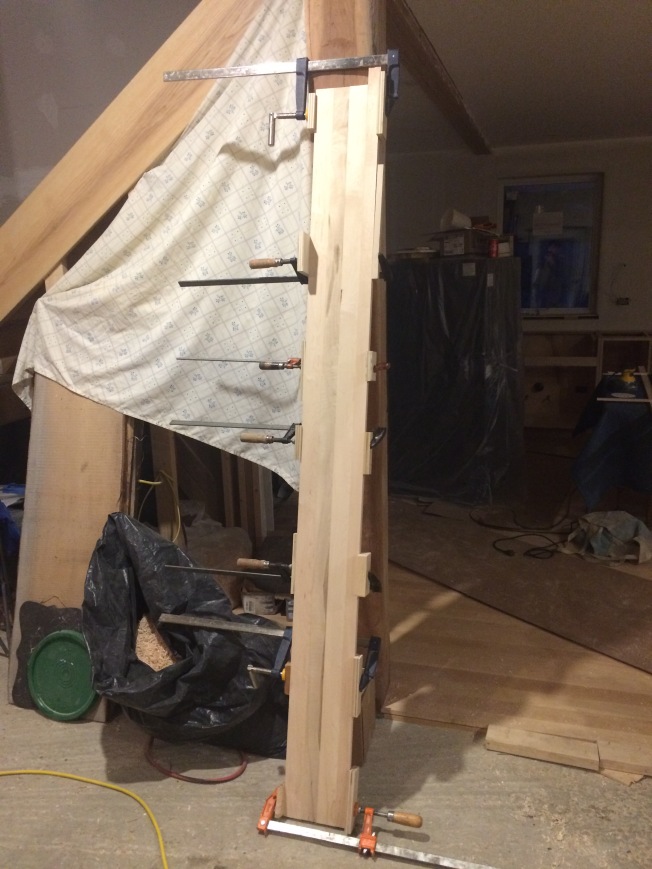
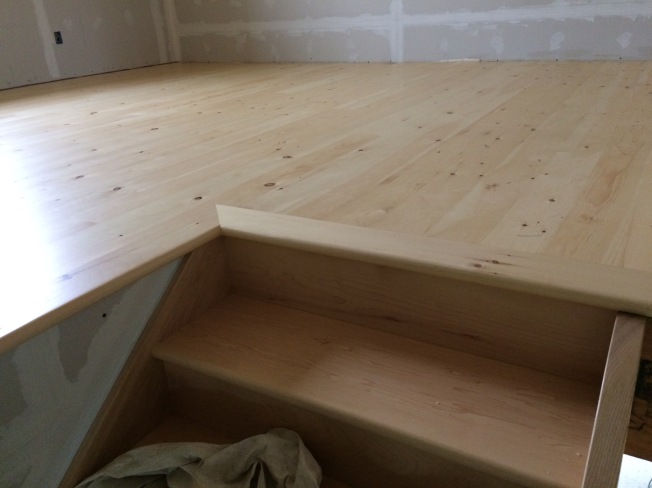
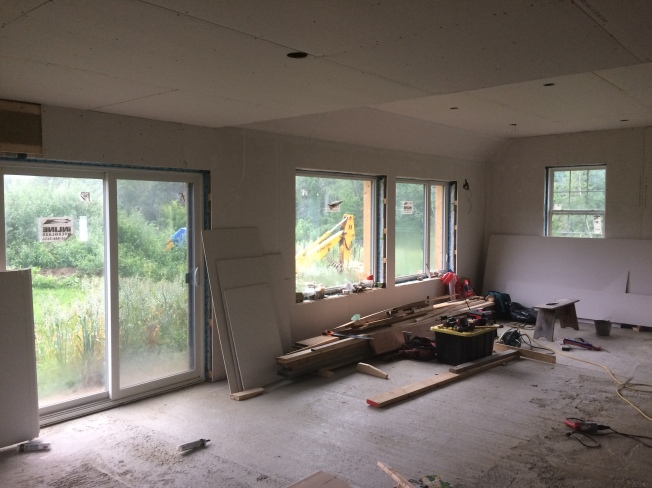
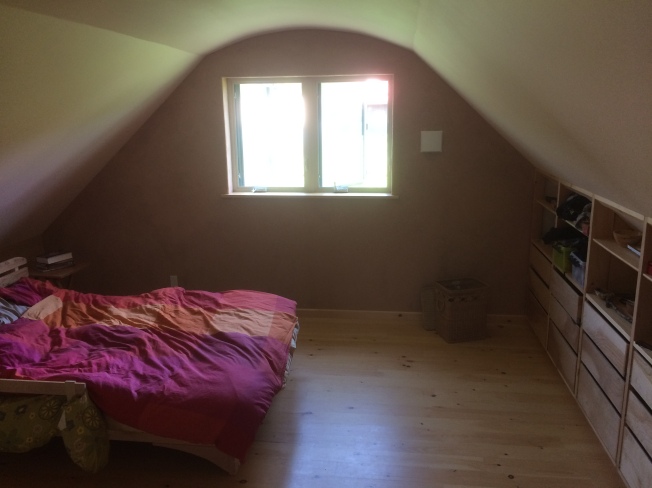
The countertops were our last large project before we were ready to move in…. and we did that sometime around the end of June.  At first it felt like an impossibly large house compared to the tiny house and how could we ever use all of this space.  But two months later we are getting used to having more space.  Nika likes having more space to make sauerkraut and can pickles, and I’ve created a little desk where I can do sewing and calculate materials lists for future projects.  As you can see, we’ve also filled up our storage unit in the bedroom.

IMG_5851

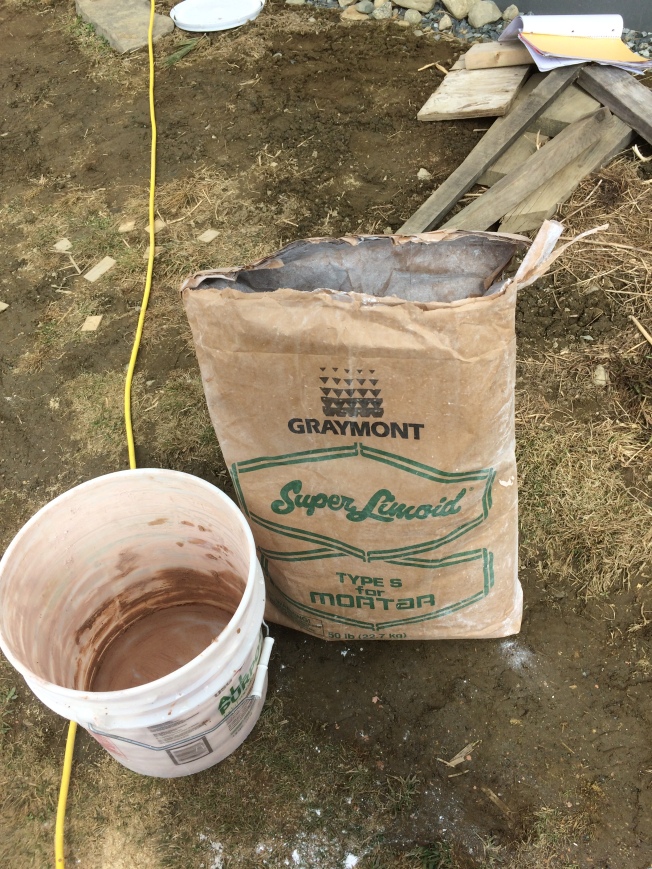
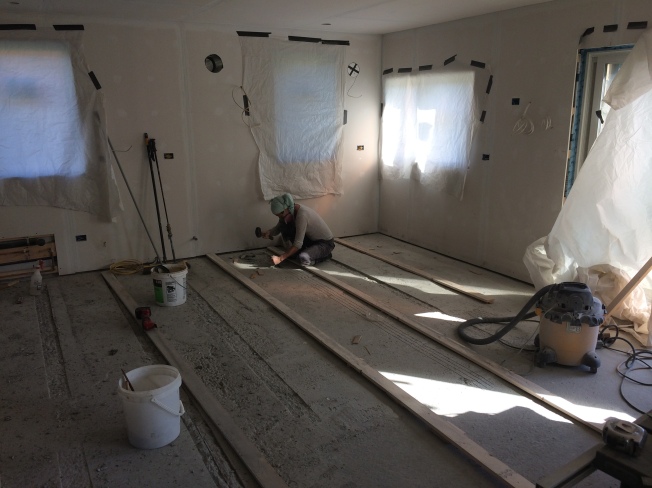
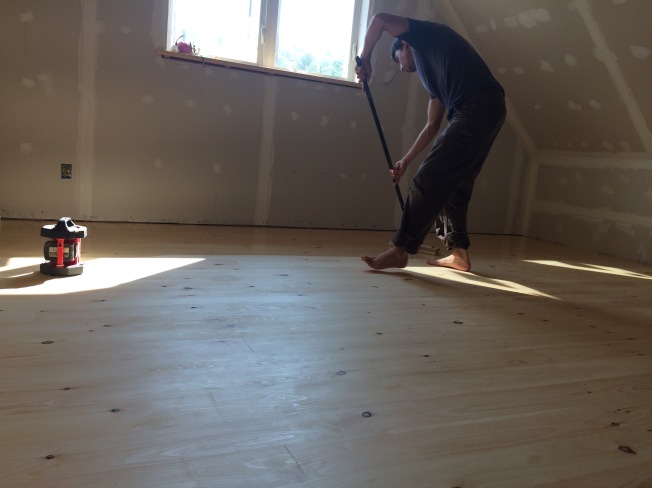
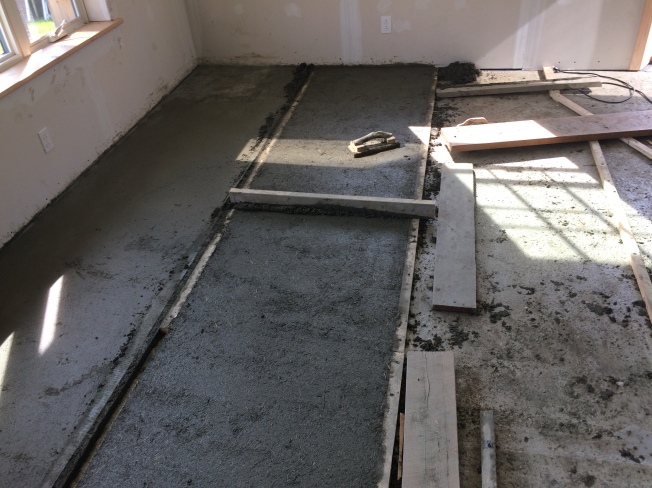
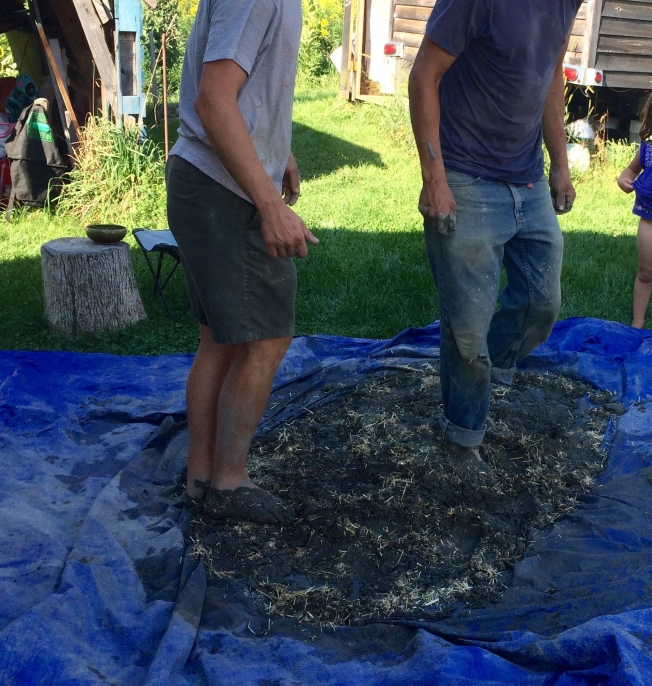
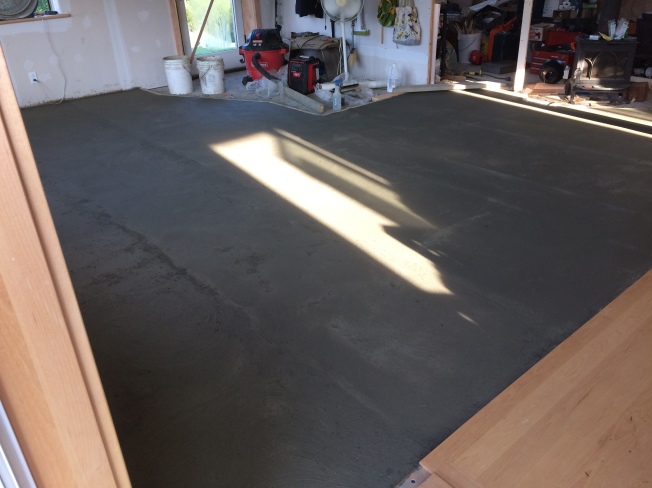
Last week was another large accomplishment for us – the installation of the first layer of our earthen floor.  We took great care in leveling the screeds you can see below.  A laser helps in this task immensely.  Because I don’t have much experience pouring concrete slabs, our slab is out of flat by about ⅝” in some places.  That combined with the fact that we want the earth floor to be at the same height as the kitchen floor meant that we needed to do an extra thick earth floor – about 1 ¼ – 1 ¾”.  Because it will be so thick, we have to do it in two layers.  The first layer will take out all of the inconsistencies in the slab and the second layer will be ½” thick all over.  After installing the screeds, we made the mix of 3 parts sand (¼” minus) to 1 part clay (this is the same clay used for clay tennis courts and is very pure) to ¾ parts chopped straw (1 – 3″ length).  We mixed these things on a tarp with our feet.  A bunch of our friends were kind enough to come over and join in the fun with us.  We were able to almost get the whole floor’s first layer done in one day.  What a project it was!

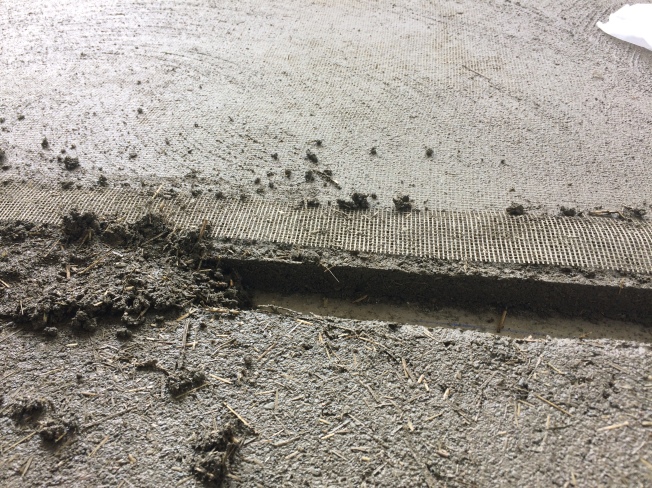
Below you can see the screeds and filling in the mix.  After screeding, we smoothed it with a wood float.

image3

Mixing

fullsizerender_2.jpg

image5

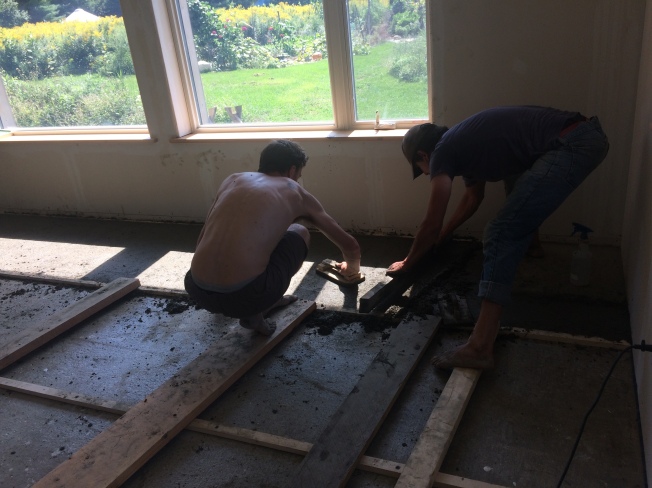
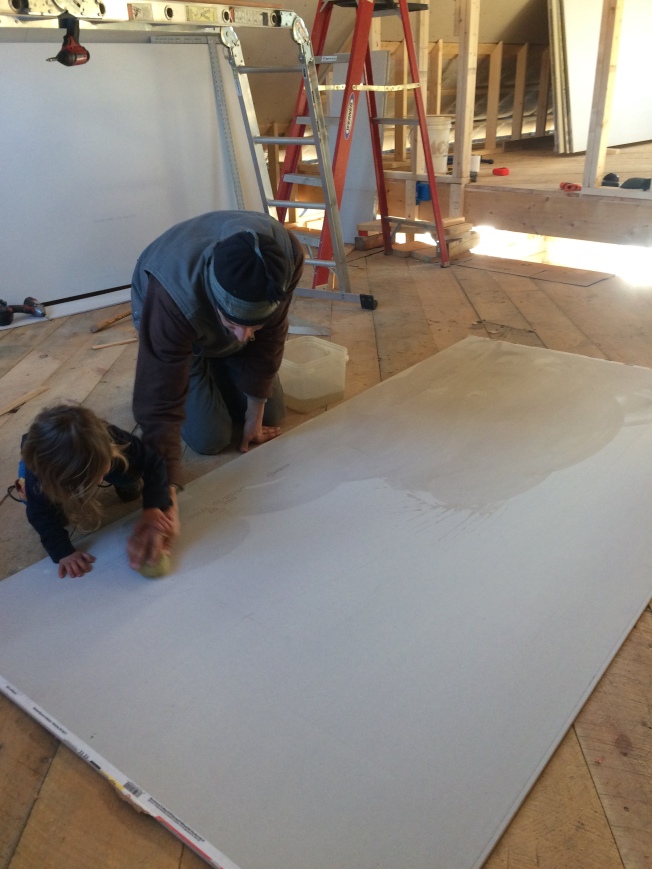
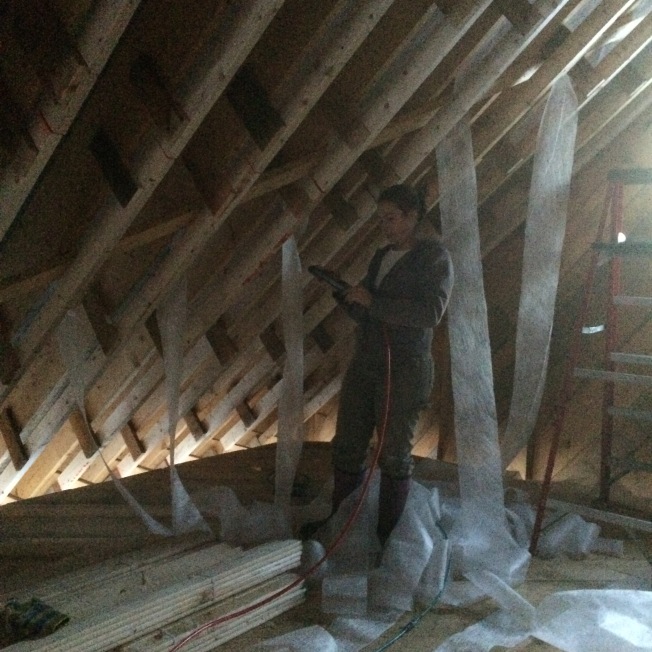
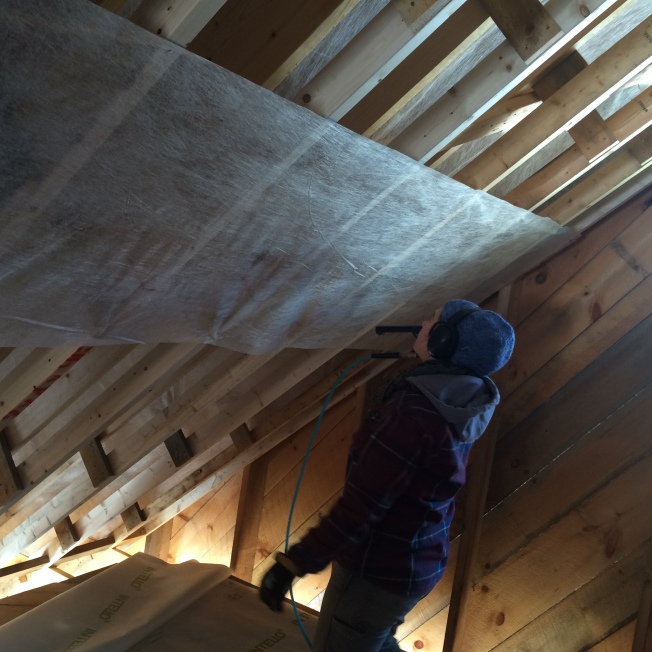
Once the mix is floated, we need to remove the screed boards and then float a fiberglass mesh into the top of the mix.  This will act as a crack stopper as it is sandwiched between the first and second layers.  We’re using a 36″ wide fiberglass mesh meant for patching cracks in walls.

image4

If the top layer of the mix had dried too much, I would spray it with water to allow the mesh to be smushed into it.

FullSizeRender_3


image2

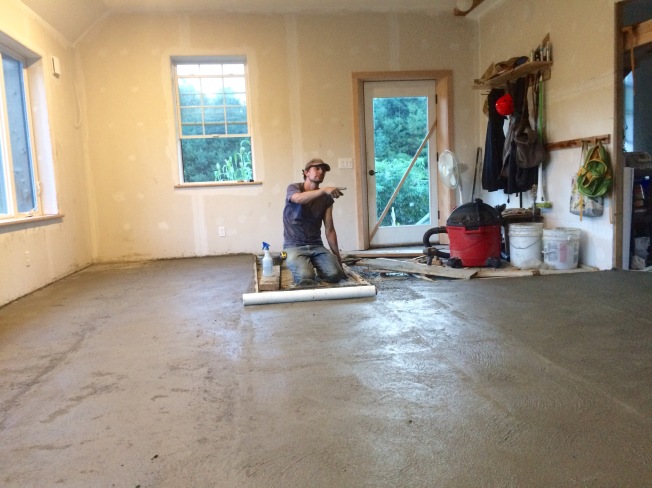
After the whole section is done, we needed to concentrate on drying it and getting all of that moisture out of the house.  We set up many fans which worked well.  It’s pretty well dry as I write this.

FullSizeRender_4

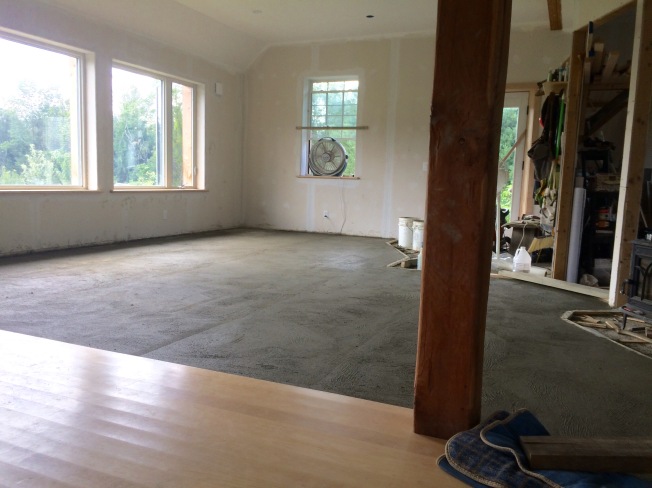
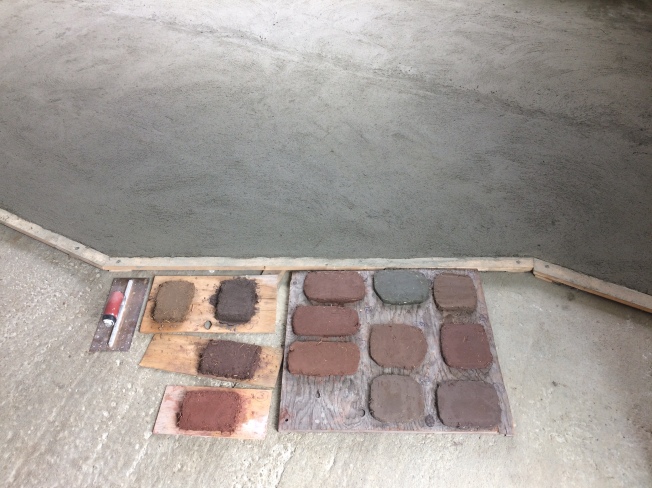
Now comes the really hard part – deciding on a final color.  Here you can see the samples Nika made for the final ½” layer.  We will tint the whole layer, then oil it and then likely cover it with a coat of wax.

image1


Cedar and Soapstone

Spring has been around us for a while now and we’ve been taking advantage of the warmer weather to work a bit outside.  We have a good start on installing the cedar shingle siding.  IMG_5688

Since second clear cedar shingles are 1/5 the cost of clear cedar shingles, we decided to opt for those.  For a sidewall, it is not that big of a deal to have some tight knots.  If it were a roof, we would have had no choice but to spring for the extra clear.  However, we do pull out the knottiest shingles and use them as the undercourse for the bottom course or save them for shims on another project.


We rented a truck to go pick up our countertop slabs and thought it a good time to make a run for the rest of the shingles.

IMG_5722

There exists a place (RMG Stone) in Central VT that offers soapstone slabs at a reasonable price if you buy the whole slab…. so we did.  The trickiest thing to figure out for us was how to get them on site.  We ended up renting a truck and building a frame to transport them because they are heavy – like 1300 pounds heavy.

The slabs fit between the two triangles.  One of the vertical edges of the triangle is purposefully angled away from vertical.  Once the slabs were inserted in the middle of the triangles, I forced a wedge between the slabs and the angled vertical 2×4.  This made a tight fit while not having to know the exact thickness of the slabs when building the rig.  It worked like a charm!

IMG_5723IMG_5725

Here you can see the wedge creating two parallel surfaces to pin the slabs between.  (The rag is attached to the wedge to avoid scratching the slabs.)

IMG_5726

Thankfully, we had six friends come over to help us unload them from the truck.  (I apologize for not getting a photo of the slabs in the truck).  They are heavy but we didn’t have far to go.  We’ll cut them outside next to where they are standing at the moment.   We plan to use a diamond blade in a circular saw with a straightedge to guide the saw.  We will cut it dry.  (yes, there will be a lot of dust.  A friend jokingly suggested that we borrow someone’s scuba tank and regulator – which may end up being a good idea!

IMG_5727


Another off-site project that is wrapped up is a 20′ colorado yurt that  Mike has been working to build the floor for and help erect.  Here are some photos of that process (the scaffolding is temporary for the raising):


Our next focus is to get the slabs cut into countertops, backsplashes, and windowsills… and …. then……. after they are installed…..we will move in!

We can’t wait and also kind of can’t believe that we actually will.

Cabinets and Plaster

Things are progressing nicely here in Vermont.  We’ve made all of our cabinets.  We decided to use the Purebond Birch Ply from Home Depot because it is labeled as formaldehyde free while other plywoods we researched were not.  We don’t know if they put other weird chemicals in place of the formaldehyde….. but at the moment it seems like the best choice.  The ply itself has some voids amongst the plys which can be frustrating at times when a screw or biscuit needs to go there…. but it all worked out.  I wouldn’t consider it a “cabinet grade ply” but given the lack of formaldehyde, I forgave it these shortcomings.  We built all of our drawer boxes as well from ½” and ¼” pure bond.

For our range, we chose a Canadian company named UNIQUE.  They specialize in off-grid appliances.  It doesn’t draw any electricity and will work when there is no power.  Most gas/propane ranges will draw a significant amount of energy for the glow bar in the oven which won’t work during power outages – not to mention they use a fair amount of electricity when the power is working.  Since we only ran 30 amps (at 240 volts) up to our house, we need to be mindful of our usage.

IMG_5671

We found our cast iron sink on craigslist.  When we were going to pick it up, we received a call from the seller saying that there was a problem with it.  When he had picked it up from the jobsite  where it was being removed, the enamel chipped.  But, he called the manufacturer and they were going to replace it for free and he was going to honor the original price to us.  So, we ended up getting a new sink at a reasonable price.  Thank you Craigslist!

For our countertops, we have found a place near Rutland, VT (RMG Stone – ask for Courtney) that sells soapstone slabs at very reasonable prices.  We purchased a slab for under $30/sf while comparable prices for installed soapstone can be from $100 – $125/sf.  We will do the install.  Soapstone is actually a fairly soft stone that can be cut with a diamond blade in a circular saw or (depending on the hardness of the stone) even with a carbide blade.  It is much softer than granite.  I have even cut some soapstone with a normal handsaw.  Soapstone is heat, acid, and oil resistant which put it at the top of our list.  Because of it’s relative softness, it can be scratched and even chipped relatively easily, but these marks add to the patina and can even be sanded out if desired.

Our curved entrance to the bathroom is finally done!  That took longer than expected since it is a pocket door – that meant we had to make two curved head casings.

IMG_5672

IMG_5649

We opted to cover the side of the fridge with plywood painted with chalkboard paint so we can make important lists and more important drawings.

Making cabinets is tiring.

IMG_E5584

Lime plastering the walls upstairs is our other major accomplishment as of late. One of the main reasons we chose to go with plaster is that it requires very little sanding of drywall joint compound!   Mike hates sanding drywall!

Applying the lime plaster was both fun and satisfying.  It doesn’t set quickly like gypsum plaster, so it is relatively stress free because of that.  But it is imperative to do subsequent coats the next day so they can bind to each other.

Mixing order:  water and pigment first.  Dissolve it well.  Then add Lime.  Mix well.  Be careful not to breathe in the lime dust!  Then add sand.  The mix should be workable but not too wet.  Like really thick yogurt.  Too thick and it’s difficult to apply – too wet and it is likely to crack when it dries.

We mixed 1 part lime to 1 part sand and pigment to desired color.  The lime is very white and has a tendency to overpower the pigments.  The sand’s color will also greatly affect the finish color.  Making lots of samples took a lot of time but was worth it to dial in the finish color.

We prepped the bare drywall with a mix of 50/50 elmer’s glue and water.  Put the first coat of plaster on the same day.  The lime came from a concrete supply store.  I guess Masons add lime to mortar to add plasticity.  From what I’ve read, lime putty is a better quality than this lime, but it’s not available in our area.

Lime, water and pigment before sand:

IMG_5660IMG_5661

Applying the first coat in the storage/nika’s workshop/yoga room:

Applying the second coat.  You can see how much it lightens as it dries.  Here the first coat is one day old.  I use a wooden hawk, a largish venetian plastering trowel and a smallish pointed japanese trowel for application.

The finished space… A huge thank you to Rob at Sun One organic farm for gifting us this beautiful oak flooring.  Thanks Rob, it looks great!  And Amanda, your geese are quite happy here.


Shining a light across the plaster helps see imperfections during application.

IMG_5663

Rounding the bullnose corners.

IMG_5659

Mike took a couple Sundays to make a much thought about item – a steambent firewood carrier.  What fun!  It is originally designed by Dave Sawyer but Drew Langsner details its construction in Green Woodworking.  It is a fun (and useful!) project and we can’t wait to make more of!  (the wood being steamed is inside the pvc pipe which is atop a pot of boiling water)

OK, back to the to – do – before – moving – in list:  Here is our $35 bed frame.  two pallets and some framing lumber (the larch headboard pieces were leftover from another project)

IMG_5666

Really pleased with the way things are shaping up.  The door trim and step/shelf between rooms will come later – as will a railing and balustrade.  IMG_5667

We have only a few things left to accomplish before we move in – and I am definitely getting a little ancy.  But I know that it will be infinitely nicer to get the messy tasks finished before moving in.  And so we are finishing them.

Looking forward, a friend recently turned me on to a new rocket cookstove design.  Mike is seriously considering making one of these (Nika is still unsure).  It has the benefit of the efficiency and clean burn of a rocket mass heater but is combined with the usefulness and resiliency of a wood cookstove and the thermal battery of a masonry heater.

Still at it!

Yes, we are.  Despite not having blogged in a while, we are still working hard.  No, we are not sitting on the beach in Thailand.  Well then, are you living in your new house you may be wondering…. no.  We have been making our list of to do’s before moving in longer…… which means that the move-in date got pushed back.  On the bright side, we are content in our cozy tiny house so there is no real rush to move in.

One of the processes we have had to invent was how to do the bullnoses at our window openings.  We really like the look of bullnose corners in many strawbale and cobb houses, but how to do that when using drywall?  You can buy pvc bullnose but I never think they look good in the end.  What we settled on was holding the drywall back about 1/2″ on both sides and then span the corner with this heavy-duty fiberglass mesh tape.  We used a plastic form with the profile cut into it to get the curve close.  Then we mudded it to keep its shape.  Mudding the curve is a little harder than doing a flat, but we’ve gotten the hang of it.  Again we use the form to get a nice profile for applying the mud atop the fiberglass tape.  After the Mud is done, we can apply lime plaster over the tape and dry mud.  I actually think it will be more durable than the pvc bullnose – but it is more work.

IMG_5395

First we installed the window sills, then the drywall returns.  Note that the drywall returns (piece that returns to the window) needed to be shimmed to the correct location in relation to the window.  This was a fussy job.IMG_5377

Shims being checked with a straight edge. IMG_5378

We dug another trench because they are so much fun.  This one was for our septic line.  I’m still glad the tractor didn’t fall into the trench! (it was close)

IMG_5440

We used some scraps of insulation atop the pipe at the bottom of the trench to give some extra frost protection since our line was only 2 – 3 feet deep most of the way.  IMG_5443

Once our trench-digging muscles were all warmed up, we dug a really really big trench.  600′ of trench to be exact.  From our shared office in the parking lot to our house, our neighbor’s house and the well.  We consulted with an electrician about wire size and some of the trickier connection details, but wired it ourselves.  We learned a lot about voltage drop and junction box fill capacity calculations.

Because of our long run and number of elbows, we didn’t think we could pull the wire through a completed conduit so an excavator friend recommended we slide the conduit onto the wire before dropping it into the trench.  So, we glued up lengths of about 100′ pieces of conduit and then slipped them onto the wire that was rolled out beside the trench.  Then we flopped it into the trench and backfilled.  Overall it went fairly smoothly.  IMG_5473

And it worked!IMG_5538

Possibly one of our least enjoyable tasks in our whole house building process has been installing our kitchen floor.  I really don’t like height transitions in the floor between rooms – call it a pet peeve.  In order to have the floors on the main level all be the same height, we needed to sink the sleepers into the concrete.  Because we are amateur concrete installers, out slab had a few bumps (the largest of which just happened to be in the kitchen!).

So, in order to do this, we first determined the highest level that the floor could be to minimize the amount of concrete removal.  Next we leveled a sleeper with shims and then used it as a guide for the concrete saw which was set to the correct depth.  The saw was run down the leveled sleeper to make four or five kerfs in the concrete.  Then we chipped out the concrete between the slices.  This left a relatively rough and wobbly surface for attaching the sleeper, so we ended up grinding down the cut section so it would be flat for the sleeper to be fastened to.  As you could imagine, this created a lot of dust.  No fun.  At all.  Happy that it is done!  A laser level was extremely helpful for this process.  IMG_5428

Chipping the concrete.  Windows have plastic to keep flying concrete chips away from the virgin glass.  IMG_5427


Once the sleepers were all set, the wood went in easily.  We were originally going to install hard maple, but when our local mill owner showed us the yellow birch (and the price tags of the two), we went with the yellow birch.  It has a similar grain pattern and not too much softer than the maple – but quite a bit cheaper.  IMG_5475

Vermont Natural coatings here too…IMG_5496

fun in the snow…IMG_5521

Upstairs we need somewhere to keep our dry goods.  So we’ve constructed a sizable bank of drawers/shelves.  And one mini-hanging closet for our (limited) supply of fancy clothes.  IMG_5540IMG_5541

It was a fun challenge to frame this out of wood rather than plywood.  But the drawers are plywood.  IMG_5546

Got a new book with lots of good knowledge.IMG_5551

Rather than taking the project to the tools, we brought the tools to the project.

Over the holidays we left the house for 10 days unattended and unheated.  We set our digital thermometer to record the highs and lows while we were gone.  Upon our return we were pleasantly surprised to learn that the low was 47 degrees – the house didn’t freeze despite sub-zero temperatures!  The passive solar is working!  Wow, what a great feeling to design something and have it actually work the way it is intended!  It is really incredible how on sunny days with arctic temps swirling outside, the downstairs will warm up to over 60 degrees with no supplemental heat.  IMG_5552

We’re making the pocket door into the bathroom into a curved opening.  It is amazing how a curved doorway can have such an effect on the whole room.  I cut thin (1/8″) strips of maple and then glued them on a form.   (more pictures next time…)IMG_5553

Our local mill gave me a good deal on 2″ wide strips of maple.  They were offcuts from a larger order.  It’s more work for us to glue them together to make the pieces we need, but helps our limited funds stretch further.  And, I’ll admit that I kind of like gluing boards together.  IMG_5554

Glued up boards will be the jamb for our door frame.  We decided against drywall returns in the doorways because these areas tend to take a beating.  IMG_5557

Note the tape protecting the air barrier from the trim nails.IMG_5559

It’s that time of year.  The sap is flowing.IMG_5583

I am a little sad to see the snow go so early, but our chickens are definitely glad to be able to scratch in the earth again.IMG_5586

Presently we’re working on kitchen cabinets and other trim details.  Slowly moving forward.

Laying floor and digging dirt

As our schedule permits, we are checking things off of our to do before move-in.  It feels good to be making progress, but we still have much to do!

We acquired some 5″ wide white pine flooring from a local sawmill.  Pine is a pretty soft wood, but it is beautiful, light colored to reflect light and fairly inexpensive.  So we think that a less heavily trafficked location like the bedroom is a good place for it.

IMG_5308

We’re using an old-school Porta-Nailer for the install- I love that thing!  For an underlayment we found an silicone impregnated paper called Silicone Vapor Shield. It is kind of like a heavy duty parchment paper that retards moisture in an effort to keep expansion, contraction, and cupping to a minimum.  Many folks use tar paper or rosin paper – but I feel that I would never want tar paper in my house (or bedroom!!)  because of the smell and this SVS is much more tear resistant than red rosin paper.   I like this stuff a lot!  It costs about $20 for 200 sf – not too bad.

Our subfloor is rough boards so there were some gaps between the finish flooring and the subfloor where the finish floor was spanning over discrepancies.  This will likely over time cause some squeaks and creaks, but we are OK with that and are still happy that we chose the local rough pine subfloor over plywood, which would have been perfectly flat.

IMG_5309

Rather than rent a floor sander, we thought we would give it a go with a belt sander hooked up to a vacuum and it worked great!  It took a little longer than the floor sander, but we saved a few dollars.  We will see how this works on our harder kitchen flooring…. If you don’t know about Matthias Wandel on Youtube, you should.  The guy is the quintessential genius inventor in my mind.  He did a great video exploring different ways to refinish a floor.  He gave us the confidence to use the belt sander.  Shining a light across the surface highlights any imperfections that need sanding.

IMG_5317

Once the sanding was finished and the dust was vacuumed, we moved on to finishing the floor.  We’re using Vermont Natural Coatings’ PolyWhey floor finish in Matte.  It’s the same as the stairs.  We really like this product, but have heard that it doesn’t hold up to heavy traffic areas…… not really an issue in the bedroom.  Here is a great video on applying the finish.

IMG_5327

As time allows, we are harvesting the last of our firewood for the winter.  We don’t know how much wood we will burn this year so hopefully we’ve got a bit extra cut and split… Ella likes to help harvest firewood too.  I’m really excited to see how much firewood we use.  At this time of year the sun really starts to shine in our south windows more and more and I can feel the heat coming through the high-gain windows.  Yesterday I was working on the drywall returns on those windows in the middle of the day and was actually so hot I decided to go work somewhere else!   IMG_5346

Here’s the floor all done and ready for baseboards.

IMG_5352

With the floor done, the weather turned hot and sunny – perfect for digging a trench!  Because our house is so airtight (preliminary blower door test came in a .64 ach 50) we will need an air intake for our wood stove.  The main reason we need it is because of our range hood – when the hood is on sucking 150 cfm out of the house and the wood stove is going, without an air intake it will begin to reverse the draft in the stovepipe and bring smoke and noxious gases into the house.  We have gone to great lengths to ensure high indoor air quality and definitely don’t want that!  The air intake pipe is an incarnation of an earth tube.  The thinking is that when air is sucked through the pipe (which is buried three feet underground) the warmth of the earth (compared to the warmth of the cold air in winter) will warm the air before it enters the house.  I’ve read of people getting 20 – 40 degrees of temperature increase by using earth tubes – so if the air is -10 F outside, it could be around 30 F when it enters the house, quite an improvement!  We dug 3′ deep because that is all we had the energy for but I have heard of people going much deeper and away from cold winter winds.  I even read of one project boasting of 20′ deep tubes!

I have found many conflicting opinions on earth tubes on the internet, mostly surrounding quality of air coming in and the potential for mold and mildew to grow inside the pipe.  since this is not our main source of fresh air for our house (some people use earth tubes to feed into the HRV of the house) we felt OK using it for this purpose.  We did use PVC pipe (and not corrugated pipe) so that its smooth walls can be cleaned with a rag on a rope and cleaner like hydrogen peroxide if needed.  Also it’s important to provide an escape for any condensation so we pitched the pipe away from the house and drilled a ½” hole at the bottom of the riser.  There is about 8″ of gravel and some filter fabric below this hole.

A lot of people advise against using wood stoves in airtight houses and I can see why. We knew from the beginning that we wanted to use wood for heat (in addition to the passive solar gain).  So we’re going to find a way to make it work.  We will try and just have the air inlet.  If that’s not enough when the range hood is on, we may need to have an in-line fan that comes on when the range hood is switched on that blows air in (to the vicinity of the wood stove) as the range hood blows it out.  I hope we don’t have to do this, but it won’t be too bad if needed.  I always like to think of what if scenarios – what if the power goes out?  We can simply open a window to balance the negative pressure caused by the range hood.

IMG_5353

Many thanks to Nick, Helen, and Natasha for their help in filling the trench!  It goes much faster with many hands.

IMG_5358

The day after filling the trench, we participated in our neighborhood chicken slaughter.  Each year our neighbors raise a flock of meat birds (this year was about 100) and we help to slaughter them in exchange for purchasing some birds at the cost of raising them.  It is a nice exchange in the sense that it connects us to our food source.  If anyone reading this has never slaughtered or butchered an animal, I definitely recommend it.  It is not necessarily the prettiest or most pleasant task, but an important thing to know how to do.  If you eat meat, know that every animal must get slaughtered and butchered somewhere.

IMG_5359

The scalded and plucker are rented – they speed things up but you can also process birds without them.

IMG_5360IMG_5362

That’s it for now…. tomorrow  we’ll be back at it!

Still at it

Hello everyone!  Yes, it has been quite a while since our last post.  Actually four months and seven days to be precise – life has been full!!.  Work on the house has been progressing, but less quickly since Mike has gone to work full time on another house in Guilford.

We were grateful to have a visit from the Grandparents back in April who lent many hands.  With our exterior insulation and rain screen vent channel behind the siding to come, we needed to box out all of the windows and the doors.  So we spent a couple days milling some old cedar boards Mike did a work trade for many years ago.  We lined the bottom piece of the box with aluminum and pitched it down by about 14 degrees.


IMG_4888IMG_4889


It was a bit of a bother getting a couple of the boxes to align properly because of the inconsistent thicknesses of the sheathing boards, but it wasn’t too bad.  We attached the boxes with simple angle brackets from Simpson and some exterior screws.  They will get caulked to the window with a good exterior caulk.

IMG_4890


We got another flock of chickens from some folks in the area who were downsizing!  Welcome to the homestead girls (and guy)!  Reason # 7008 I love having a hatchback!

IMG_4897

After we finished installing the window boxes, we were able to start installing the 3 x 4′ sheets of Roxul ComfortBoard.  Roxul also makes larger sheets which I tried to get but was told they are only sold by the truckload.  Since then I’ve talked to a local builder who used the larger sheets and said they were actually a pain because they were too big and would break when being carried to be installed.  So if anyone’s out there thinking of using these boards on a wall, go for the 3 x 4 sheets.  Maybe the larger ones would be well suited for under a slab where they don’t need to be hoisted up a ladder and held in place……

IMG_4898

I really liked how easy it was to get tight joints with the Roux at adjacent pieces and around openings.  Much more so than with foam board in my opinion.IMG_4899


Lapping all of the seams between the two layers.   And here you get a good look at the brackets we used to attach the window boxes.  Also note the screen above the window boxes to keep bugs out of the rain screen.  Screen is also installed at the bottom of the wall for the same purpose.IMG_4906IMG_4907IMG_4908

On the west side we plan to have a porch and porch roof some day so we are installing the roof ledger now.  I was flummoxed about how to best install the ledger without getting into complex flashing details.  Then our energy consultant through Efficiency Vermont made a great suggestion.  We used 3″ PVC squash blocks beneath the ledger and really long (10″) timber lock lag screws.  They were cut to the length of our insulation plus strapping (4 ¾” in our case).  But the genius was in how to install the squash blocks. We bought an automobile oil filter remover for a drill (about $10) and screwed the pipe lengths into the roxul!  This way there was still a plug of insulation inside the pipe.  It was a little tricky to get the hang of on a ladder, but I did and it worked well.  I’d definitely do it this way again.  I guess the only caution is that the drilling doesn’t go too deep and too long so as to rip the mento WRB under the Roxul.

IMG_4934


In the drill setup below  I used a hose clamp because the device wasn’t gripping the pipe well enough without it.  Here’s a quick video to help you see how it works.IMG_4935

The finished ledger.

IMG_4962

As I think I noted before, we had trouble last winter with our foundation insulation cover/flashing of aluminum heaving up with the frost.  This caused water to infiltrate through the bottom of our sliding door.  So we had to pull the door and re-do the sill flashing.  Previously we were relying on a slight slope towards the exterior (which was reversed by the heaved flashing).  This time we added a lip on the inside of the flashing in addition to a slope towards the exterior.  It hasn’t leaked since! (thank goodness).  At the same time we removed the soil all around the perimeter of the flashing down to the wing insulation to rectify what the frost heave pulled up.  We pressed the flashing back down to ensure we had positive drainage away from the building and then used long fasteners to attach the flashing to the foundation.  We then backfilled it with crushed stone to ensure that we would not have any more issues with heaving of our foundation flashing.IMG_5023

Ella’s helping to re-grade the soil after we backfilled with the crushed stone.  IMG_5113

Here are some photos of the exterior presently.  We’re ready to do the siding, but at the moment are focusing on the interior work.  We’re hoping to be able to move in for this winter so the siding is on the back burner for now.  Note the insect screen at the bottom of the roxul ready to be tied in with the siding.  IMG_5210IMG_5212

Inside we’ve been working on finishing up the last wiring details, light locations, and installing drywall!  How exciting!  Drywall has an amazing capacity to change the feel of the room quickly.  In the next photo we show off our fancy sound deadening trick.  Glue drywall scraps between the studs.  Helps reduce sound transmission as well as keeps them out of the landfill.  IMG_5214

At the moment we’re leaning towards doing a lime plaster on most of the wall/ceiling surfaces.  I’ve been really impressed with what I’ve been learning about lime and the cycle of it’s use.  IMG_5216

Here we’re getting ready to put the last sheet on in the kitchen.  It’s kind of hard to tell, but there’s a pocket door in the left side of this wall.  IMG_5237

That’s it for now….

Out with the ladder, here come the stairs

In the past weeks, we’ve completed most of the wiring.  It is actually pretty easy to run wires with the service cavity because wires slip underneath the 2×3’s rather than needing holes to be drilled through all of the studs.  However, we did still need to drill through interior partition walls and joists.  Here’s a shot of many wires coming into a switch box at our main entrance.

IMG_4818

We built a utility room in our bathroom for …. utilities.

IMG_4814

Here’s our main AC panel.  We will probably have another smaller panel for DC loads.  The switch box to the left with the 18ga wires hanging from it is the control switch box for the Lunos HRV’s.

IMG_4816

We also framed out a half wall which will enclose the alcove tub.  Our vanity will be on the other side of the half wall.  In the floor can be seen the recess which we hope will accommodate the tub’s trap… fingers crossed

IMG_4815

The largest project of late has been creating the stairs.  We’ve decided to make a housed stringer stair.  A typical stair is built with rough stringers (usually a 2×12 with triangles cut out from it) and then trimmed out later with treads, risers, returns, and skirts.  But Mike likes the housed stringer style of stair because the frame is the finish.  The structure and the finish are all done at the same time – what you see is what you get.  We bought some 8/4 ash for the stringers, 5/4 maple for the treads and 4/4 maple for the risers (from Bradford Woodworking in Northampton and Forest Products Associates in Greenfield).  Mike milled it all down in the living room.  The hardwood supplier says there is a glut of Ash at the present time due to the emerald ash borer….. we may not have this tree much longer if things progress like this – could the ash go the way of the chestnut???  I hope not!

The stringers:…. Nice Ash you have there!!

IMG_4811

The soon to be treads and risers:

IMG_4812

There are a couple of ways to build winders, but the simplest seemed to be to build triangle boxes and then trim them out later.  It is also possible to build winding housed stringer stairs – maybe next time.

IMG_4813

Two pieces of 5/4 maple about to be glued up for a tread.  I really appreciate biscuits for an application like this.  Not only do they add strength to the joint, but they help immensely with alignment during clamping.

IMG_4819

Dry fit passed and ready for glue

IMG_4821

All glued up and clamped.  checking for flatness.

IMG_4822

If you can produce a nice tight joint, lots of clamps aren’t necessary.  I like to set the boards vertically after clamping and let the glue run down the seam for about 10 mins.  By then the glue has just begun to get a little firm.  It scrapes off nicely and then I give a quick wipe with a wet rag and the joint is left clean.  Leaving substantial glue on the joint can wreak havoc on your planer blades afterwards.

IMG_4823

One of the many reasons I love this time of year is that our swales fill up with water.  This gives a nice long drink to our fruit tree roots as they unthaw.

IMG_4825

Ella’s excited for the garden this year, too!

IMG_4829

We managed to find a few hours to boil a bit of that sap we’ve collected.

IMG_4835

Now- back to the stairs – laying out the stringers.  I took great care to get it right here to ensure a smooth install.

IMG_4836

The jig is clamped and ready to go (putting the router to good use, Peter!).  A couple of good resources for building housed stringer stairs:

video for making the template

five part Video for making the stringers

Great book on making many types of stairs including housed stringers.

IMG_4837

One stringer done

IMG_4838

After the treads and risers were routed out, we needed a rabbet on the bottom edge for the drywall.  It will be screwed to the the bottom of the stringers, recessed into the rabbet on both stringers – hiding the underside of the treads and risers.

IMG_4839

Our perimeter drain has been active these past days with all of our melting snow and rainfall…. a convenient place to wash one’s hands.

IMG_4843

Here we go – after MANY hours of planning, milling, measuring, marking, routing, and cutting it is finally time to glue it all together!  The treads and risers are connected to the stringers by wedges and glue.  When the wedges are driven home, they are not coming out!  They are really tight!  It is definitely not ideal to use two clamps together like this, but we are lacking in long clamps so we made due.

IMG_4848

After installing the top and bottom two treads to keep the whole thing together, we heaved it into position.  Light is not a word I would use to describe it.

IMG_4849

wedges and glue driven in from behind.  It is not shown here but we used pocket screws to connect the top of the risers to the bottom of the treads.

IMG_4851

The finished stair:

IMG_4852

Really happy with the way everything went together.  It all fits nicely.

IMG_4853

That’s the big excitement around here.  Tomorrow we will begin applying the finish to the stairs so that we can use them.  We decided on Vermont Natural Coatings’ floor finish.  it is a Whey based clear coat designed for floors.  We’re not sure when we will install the treads and risers on the lower winder stairs – probably when we install the flooring in the kitchen (it will also likely be hard maple).

As the days turn warmer we plan to move outside and begin installing the exterior roxul to the walls and building the window extensions to go with it.

Ella is excited for spring!

IMG_4809

decisions, decisions

In the past weeks we have mostly been making decisions.  Though we have also been erecting interior partition walls and deciding about light and switch placement, the decisions are the most challenging aspects of our build at the moment.  Ella enjoys helping to hold things.

img_4704

Nika was feeling like the ceiling in our bedroom was a little too flat…. so we took it down and cut a curve into it!  Kinda looks like a whale’s rib cage installed up there.

img_4743

We made a pattern that felt good to us and then traced it out onto the others before cutting it with a bandsaw.  We could have cut these pieces from a single 2×10, but the sides would have been rather brittle and weak.  So we used the existing 2×4’s from the old ceiling and added another short section of 2×4 to each end.  Then we cut the curve to the whole thing.  Because we are installing drywall atop them, the don’t need to be perfect.  ⅛” is close enough.

img_4752

Making good use of my grandfather’s band saw!

img_4744

The internet says that a ½” sheet of drywall will bend to a 10′ radius.  ⅜” drywall will bend to a 7′ radius and ¼” to a 5′ radius. Ours is just about 7′ so we chose ⅜”.  The internet also says it helps the bend if you wet the back of the sheet – so we did that.  It bent quite easily, no cracking.  It was a challenge to lift it, hold it, push it to conform to the bend and screw it all at once for the two of us, but we managed.  Then we put in A LOT of screws.  Probably about every 2″ along the ribs.  Oh and we also decreased the rib spacing to 9 ⅝” on center.  It worked quite well.  I’m excited to see it after mudding and taping.

img_4760

It’s been quite warm around here…. which means that the sap is flowing!  We’re not sure if we’ll have time to boil any syrup, but our three taps have been giving us a steady stream of sweet refreshing sap to drink.

img_4720

One of the other odds and ends I worked on in the past weeks was installing the duct for the vent fan.  It didn’t get done before insulation (which would have been easier).  But we were really impressed by the self-supporting nature of the cellulose.  This picture is looking up the rim joist insulation (at the bottom of the carved away bay is the top plate of the wall with joists on both sides of the carved away insulation).   Though gravity is doing it’s thing, the insulation doesn’t fall down.  No settling here.


img_4732

Ella is getting her fill of snow before it all melts and runs into the stream…

img_4737img_4739img_4740

This next picture is very exciting for me to show.  It is of our perimeter drain discharging water!  All that time we spent installing it and carefully pitching the slope has paid off!  The water table is very high will all the melting snow and rain we’ve recently received so it has been flowing for the past three or four days.  I am so glad it works!

img_4745

We’re going to keep on with our electrical wiring.  If the warm weather continues, we will most likely begin installing our exterior roxul board so that the shingles on the outside of the walls can come next.

Insulation and airsealing

As you may expect, we have been busily chugging along on what we affectionately call “the big house” which is in direct correlation to the space we currently occupy “the tiny house”.  After our holiday vacation, we returned to the dusty work of blowing in the cellulose.  To prep the space, we stapled up Insulweb with upholstery staplers.  Once the blowing began, it went pretty quick.  It took about 2 ½ days to do the blowing.  Our roof being 17.5″ thick took a little more work.  I think that Whip (our insulator) made three passes into each bay to ensure that the proper density was reached.

Our insulation, like many of our favorite things, is made in Quebec!

img_4609

Here is the machine with a bag ready to be broken up and blown into the shell:


img_4610

It was difficult to estimate the exact amount of cellulose needed – I overestimated and we had 100 bags left over!

In the next picture, you can see the Intello billowing out after the cellulose is installed behind it.  It is definitely a good idea to not space the strapping (or framing if you’re blowing directly behind the Intello) larger than 16″ oc.  We had relatively few staple pops which we were glad for.  Friends of ours did 24″ oc spacing and because many staples popped, they had to put a dab of caulk atop of every staple to ensure the airtightness.

img_4612

In this picture, we are in the process of blowing.  Some wall bays are done, some are empty. The cavities between the floor joists have been initially filled from above.  He then came back and inserted his hose from below the joists to bring the density up.

img_4613

An up close shot of the staples holding well.

img_4650

Whip filling a bay.

img_4651

Whip bringing up the density of the lower roof cavities

img_4652

Ella named me the “dusty man”

img_4655

After installation, we vacuumed everything!

img_4689

And most of the wall bays, because they are 24″ oc, needed to be rolled flat.  It is normal for the cellulose to bulge during blowing, but when rolled with a roller it flattens out so that sheetrock, or in our case, strapping, can be installed atop the studs.

img_4691

Then the air sealing fun started.  Our primary air barrier is an interior one on the inside of the wall studs (the Intello).  This means that we want to seal every crack and crevice as best we can.  We tape all seams and use an acoustical sealant (tremco) around all window and door penetrations to minimize air leakage.  Around windows we used Pro Clima’s Profil tape.  It is a very nice tape to work with.  It has multiple sized release strips on the back so it makes it very easy to tape in tight corners like from a window frame to the rough opening frame.  We have been really impressed with the ease of workability and the tenacious adhesion of the pro clima tapes.  They are top notch!  (with one exception – the extoseal.  It gets a little thin when stretched.  I have never used DuPont Flexwrap, but would try it and see if I like it better than the Extoseal)

img_4693

Here you can see how we taped around each joist to obtain a complete seal.

img_4692


Once we finished with the air sealing, we needed to make a major decision about the layout of our kitchen.  To help us visualize it, we made a life size mock-up with clamps, 2×4’s and saw horses.  It is the best way to quickly get a feel for the finished space with different options.

img_4684img_4685

Then the next task at hand was adding interior partitions upstairs as well as framing out the ceilings.  Here is our solatube capturing lots of light!

img_4686

Upstairs partition wall…

img_4687

One traditional difficulty with keeping the integrity of the internal air barrier comes from electrical boxes and wiring.  It is difficult to seal all electrical boxes when they are installed in the traditional fashion.  To solve that problem, it is recommended to add a service cavity on the inside of the air barrier.  We’re adding 2×3’s to give us a 1.5″ space for boxes and wires and some plumbing pipes (larger pipes will require a larger space that will be hidden behind cabinets…. later).  Wires can be slipped behind the 2×3’s in the middle of the bays by compressing the insulation a little..  This wall is ready for wiring and then drywall (with the exception of one 2×3 at the bottom of the window)

img_4694

We’ve also been framing the knee walls at the edges of the room.

img_4696

Our next projects are to continue with service cavity installation downstairs, build stairs, and begin wiring… We’ve also been working to design our solar PV system.  There is a lot of good information on the web about it, but we would like to consult with a PV professional about a few details.  If anyone knows of someone in the Brattleboro/Greenfield area who could do some consulting, please connect us!

A door and a vacation


We bought a sliding door panel at a re-used building materials store in Springfield, MA for $50.  After drilling the holes for the knob and mortising in the hinges, it works great.  Eventually we plan to build our own door, but with so much to do it is not near the top of our to-do list.  This will suffice until then.

img_4513


img_4521

Ella – apprenticing as a fish

img_4451

To begin our cellulose prep, we isolated our rafter bays by stapling strips of insulweb to the sides of the rafters and the 2×4 bay extensions.  Our cellulose installer recommended this to help the installation go quicker.

img_4515

Our friend Amanda came back to lend a hand for a few days, which was most welcome!  Our cellulose guy, Whip, lent us some upholstery staplers which make this go much faster.  It’s kind of like a turbo fire stapler.

img_4511

We will install a strip of insulweb about 30″ wide across the roof plane where the two sheets of Intello meet.  Then we will let the edges of both sheets flap down, exposing the insulweb below it.  The hose for the cellulose will be inserted through the insulweb.  After the installation is finished, the edges of the Intello will be folded up and taped.  This saves much hole patching in our Intello by reducing the amount of cellulose hose insertion points.

img_4516


Below you can see the strapping which holds up the flaps of the Intello edge and also secures the insulweb beneath it.

img_4518

There’s always time for some fun in the snow

img_4490

We’ve had a beautiful Bard Owl that’s been hanging around our field looking for prey.  Here it is perched upon our Bison Pump on our well.

img_4532

We’re on a break to celebrate the holidays with our family but look forward to blowing in the cellulose next week.